
Trimming your cannabis plants the right way can mean the difference between a high-quality yield and a disappointing one. I’ve trimmed hundreds of plants over the years, and I know how easy it is to feel unsure when it’s time to snip.
One small mistake can affect the look, feel, or even strength of your buds. That’s why this guide focuses on real methods that work, not guesses, not hype. You’ll learn when to trim, which tools to use, and how to handle your buds without damage. The steps here come from hands-on work, not just reading or copying others.
We’ll also talk about mistakes many beginners make and how to avoid them. By the end, you’ll feel ready and steady. This guide is clear, direct, and based on what gets results because your crop deserves that kind of care.
Understanding Cannabis Plant Anatomy for Safe Trimming
Before you start cutting, you need to know what you’re working with. Cannabis plants have different parts that require various treatments. Get this wrong and you’ll damage your buds.
Let me break down the basics for you.
Identifying Different Leaf Types
Fan leaves are the big ones you’ll notice first. These are the large, 5-pointed leaves with long stems that stick out from the plant. They’re easy to spot and safe to remove. Sugar leaves are entirely different. These small leaves grow directly from your buds. They’re covered in sticky trichomes and contain valuable compounds.
Here’s what matters: Fan leaves can go. Sugar leaves? That’s where you need to be careful. Some growers keep them, others trim them close. The choice depends on your preference and the final product you want.
Never confuse the two. Fan leaves are obvious targets for removal. Sugar leaves require thought and precision.
Understanding Trichome Fragility
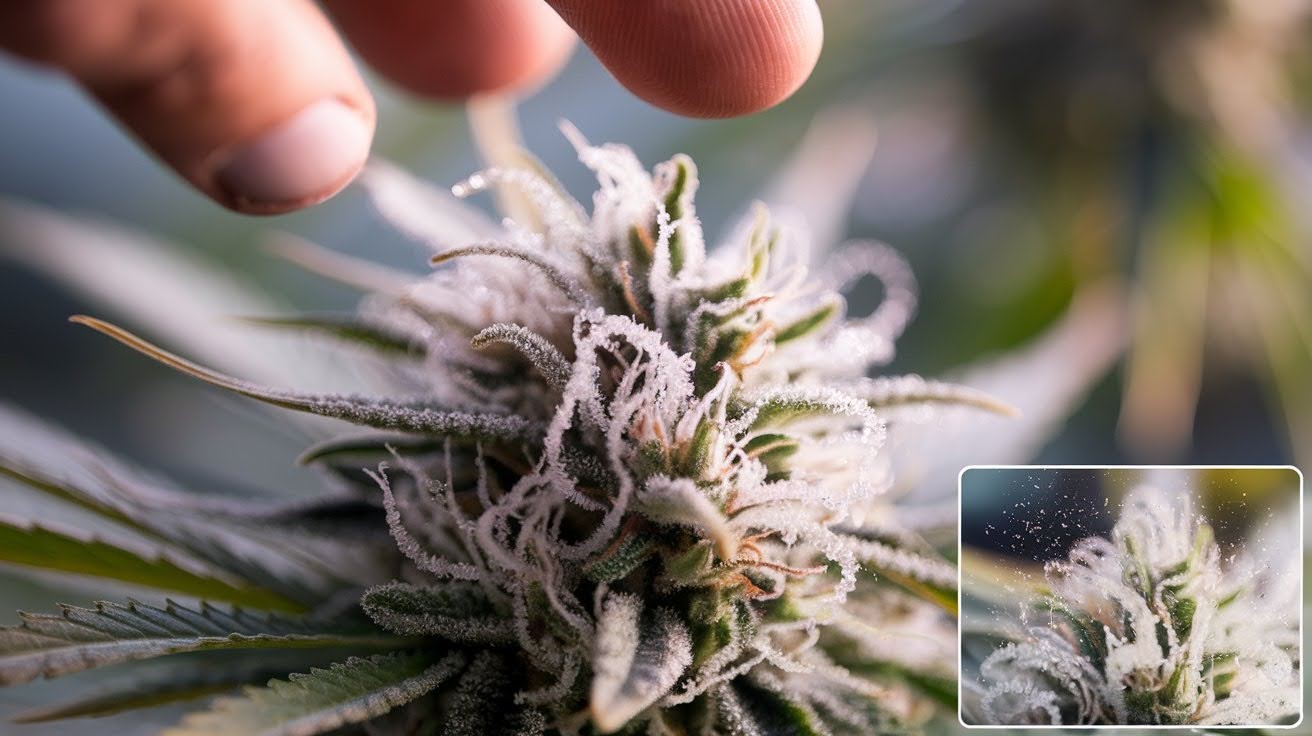
Those tiny, crystal-like structures on your buds are trichomes. They hold most of your plant’s potency. Touch them too much and they break off.
Physical handling is the enemy. Every time you grab, squeeze, or brush against buds, you risk losing trichomes. This directly affects your final product’s strength and quality.
Watch for these warning signs: trichomes turning amber too quickly or falling off like dust. When you see this, you’re handling it too roughly.
Essential Tools for Damage-Free Trimming
The right tools make all the difference. I’ve seen too many growers ruin good buds with dull scissors and poor setup. Don’t let that be you. Quality tools protect your harvest and save your hands from cramping.
Selecting the Right Cutting Tools
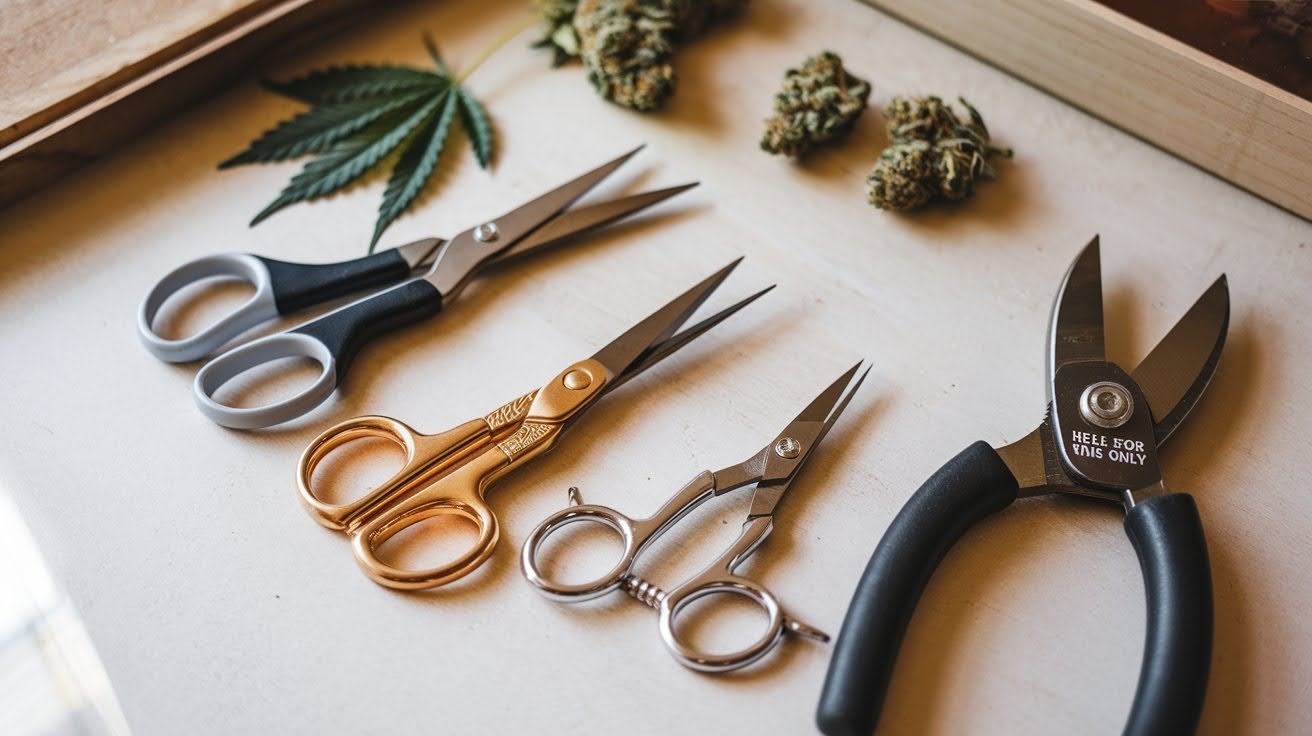
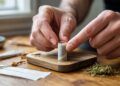
Sharp scissors are non-negotiable. I recommend Fiskars scissors with thin blades. They cut clean without crushing delicate plant matter.
Bonsai scissors work great, too. These small, precise tools give you better control in tight spaces around buds.
Look for spring-loaded mechanisms. Your hands will thank you after hours of trimming. The spring does the work, not your fingers.
Heavy-duty pruning shears have one job: cutting thick stems. Please don’t use them on anything delicate. They’re too powerful and will crush your buds.
Here’s what I always keep handy:
- Primary trimming scissors (sharp, thin blades)
- Backup pair (because resin clogs blades)
- Pruning shears for main stems only
Workspace Setup and Tool Maintenance
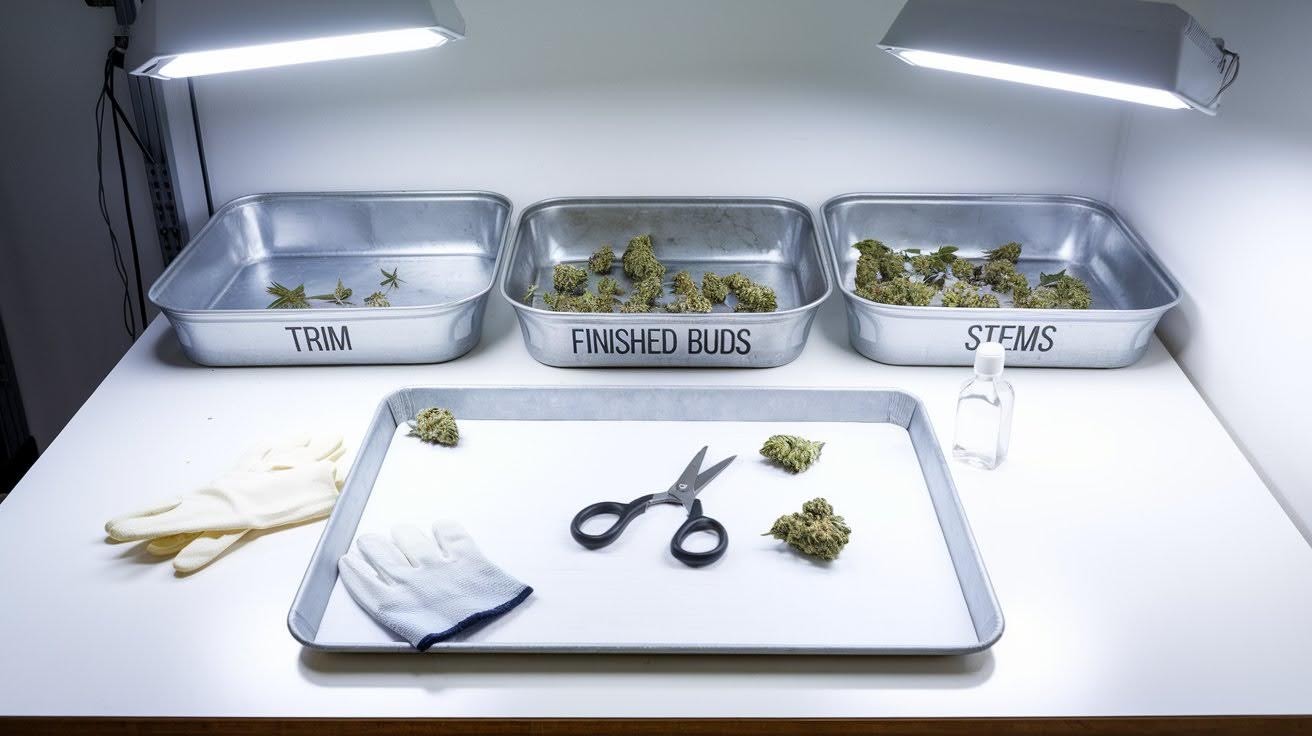
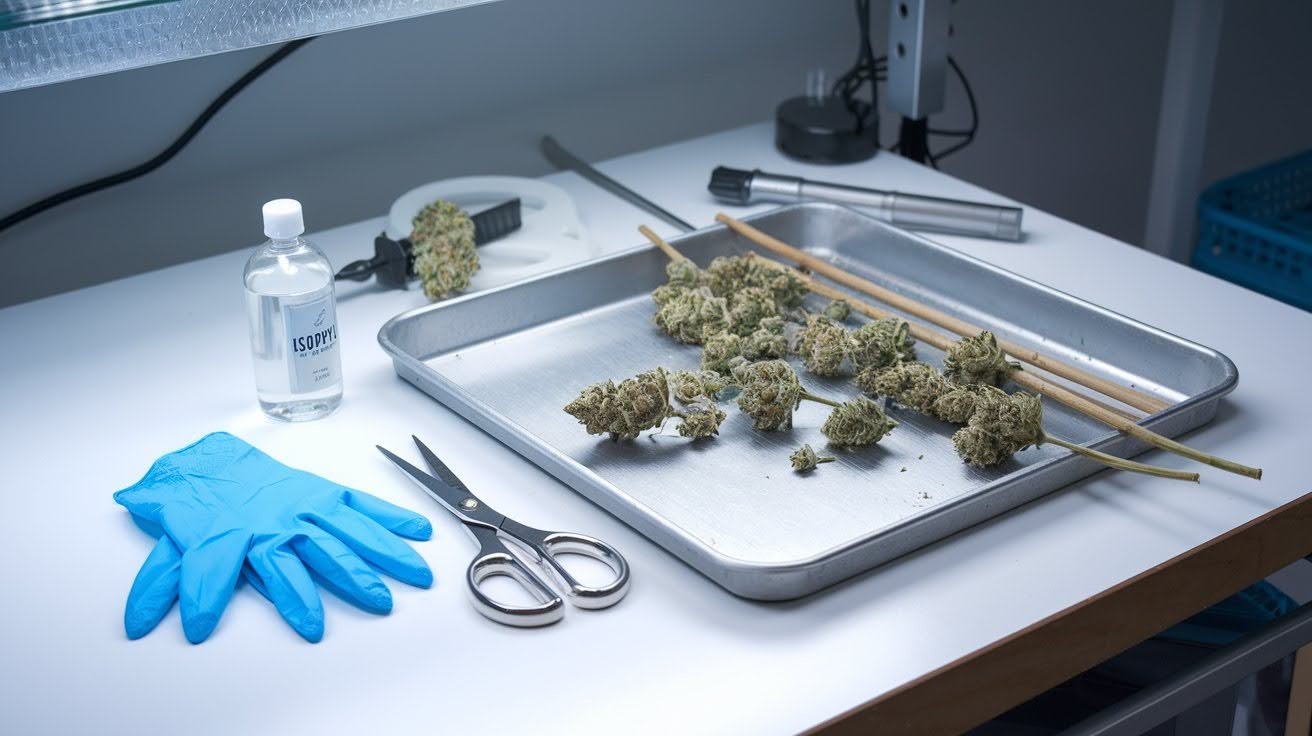
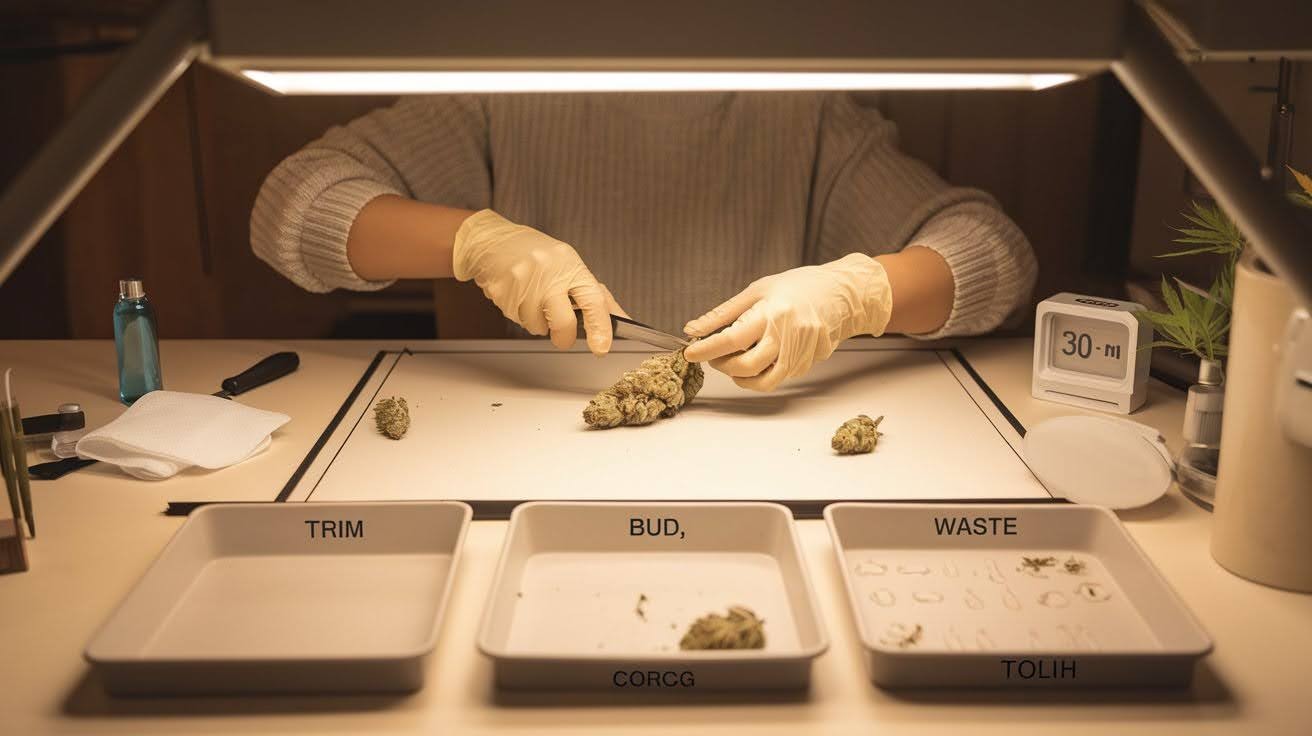
Disposable gloves prevent sticky fingers. Change them often as resin builds up. Clean gloves mean better grip and less contamination.
Multiple trays keep you organized. I use cookie sheets – one for trim, one for finished buds, one for stems. Good lighting shows you precisely what you’re cutting. Poor lighting leads to mistakes.
Clean your tools with isopropyl alcohol every 30 minutes. Resin buildup makes cuts messy and can tear plant tissue.
Step-by-Step Damage-Free Trimming Process
Preparation prevents problems. Skip these steps, and you’ll make mistakes that cost you quality buds. Let me walk you through the exact process I use every time.
Initial Preparation
Start with clean hands. Wash thoroughly, then put on fresh disposable gloves. Dirty hands transfer bacteria to your buds.
Sterilize your tools with isopropyl alcohol. Wipe down scissors, trays, and work surface. This prevents contamination and keeps cuts clean.
Break down large branches into smaller, manageable sections. Working with huge branches leads to accidents. I prefer sections about 12 inches long.
Size matters here. Smaller sections give you better control and reduce the chance of dropping or damaging buds.
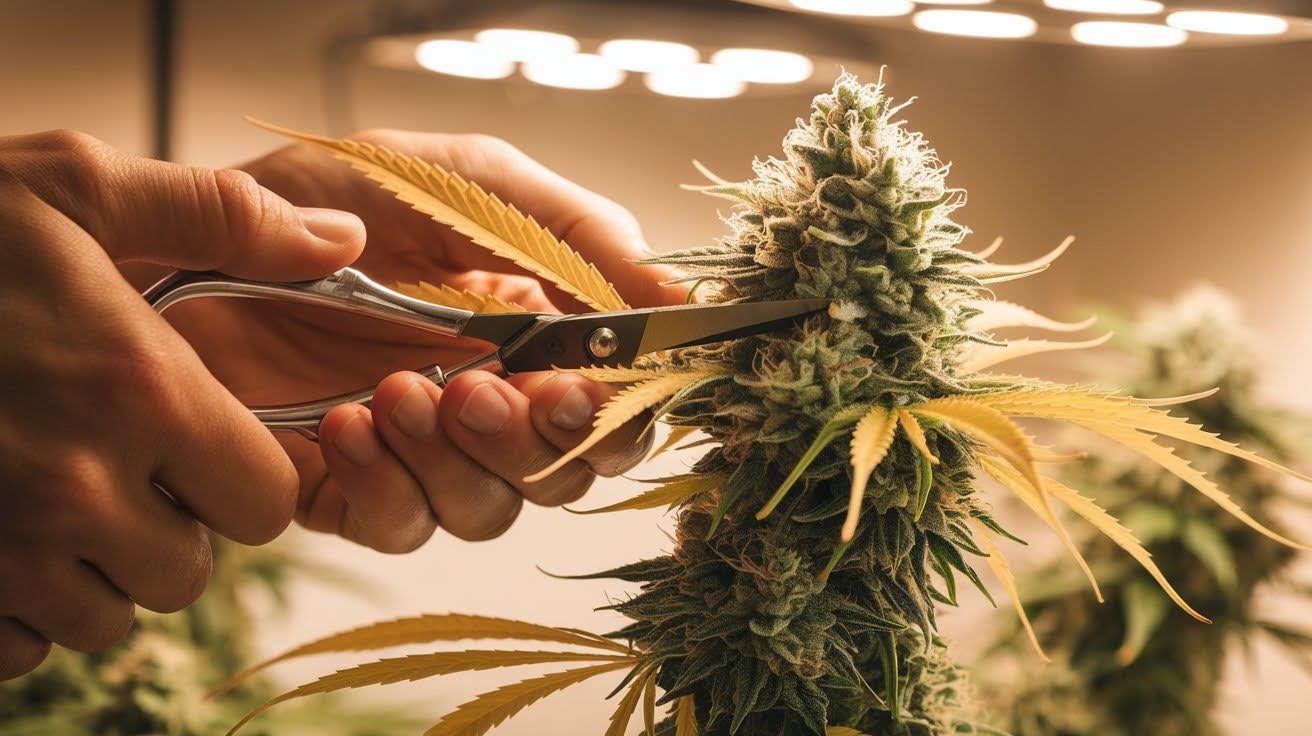
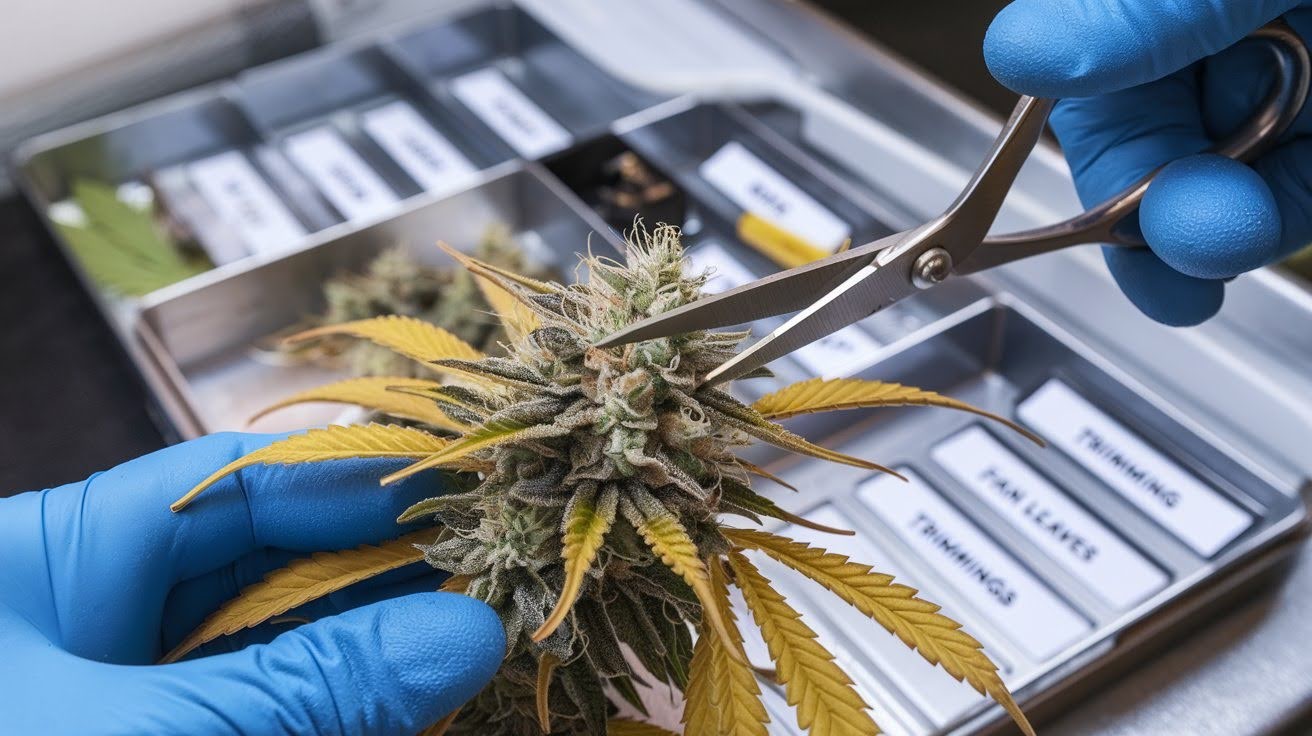
Primary Trimming: Removing Fan Leaves Safely
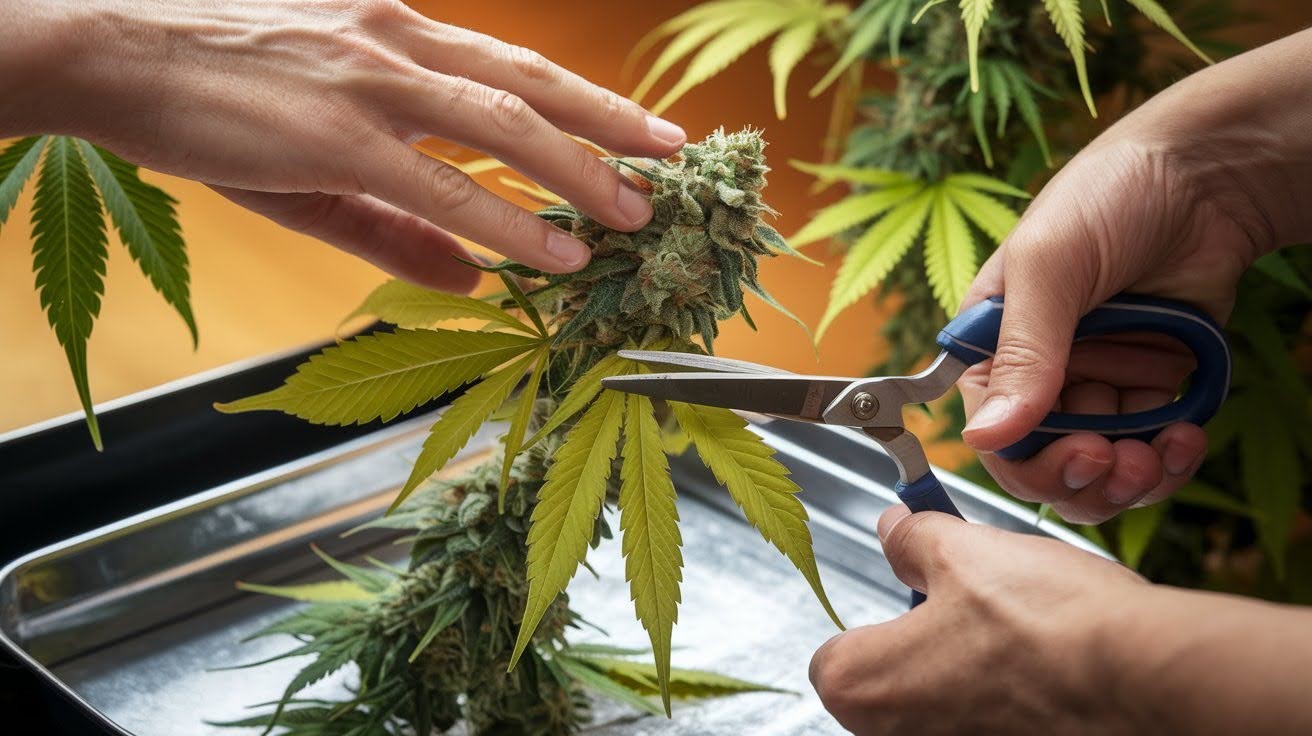
Fan leaves come off first. These are your practice targets before moving to delicate areas.
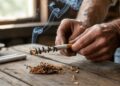
Use the finger-plucking method for most fan leaves. Grab the leaf stem close to the branch and pull gently downward. Never pull toward the bud.
Support the bud structure with your other hand. This prevents the entire branch from moving when you remove leaves. When to use scissors?
Only when the leaf stem is too thick to pluck cleanly. Cut at the base where the stem meets the branch. Avoid cutting into bud material. Keep your cuts clean and precise at the stem bases only.
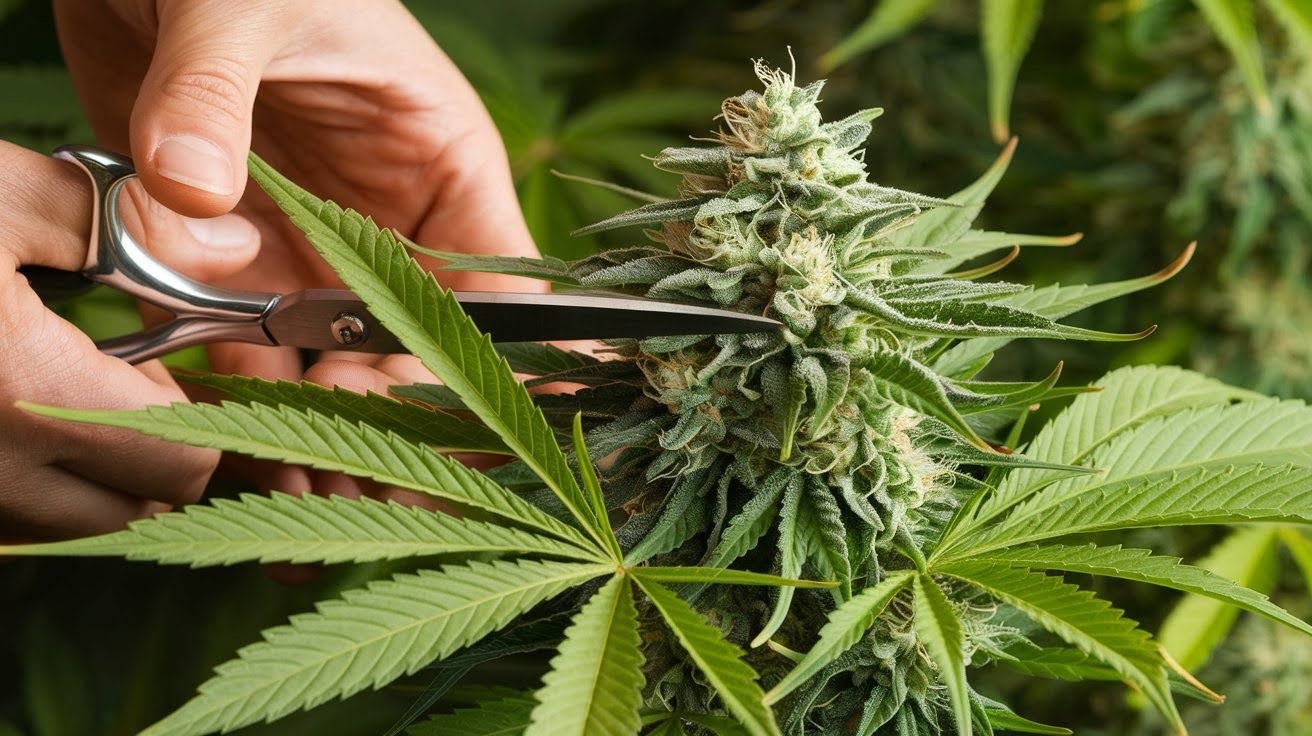
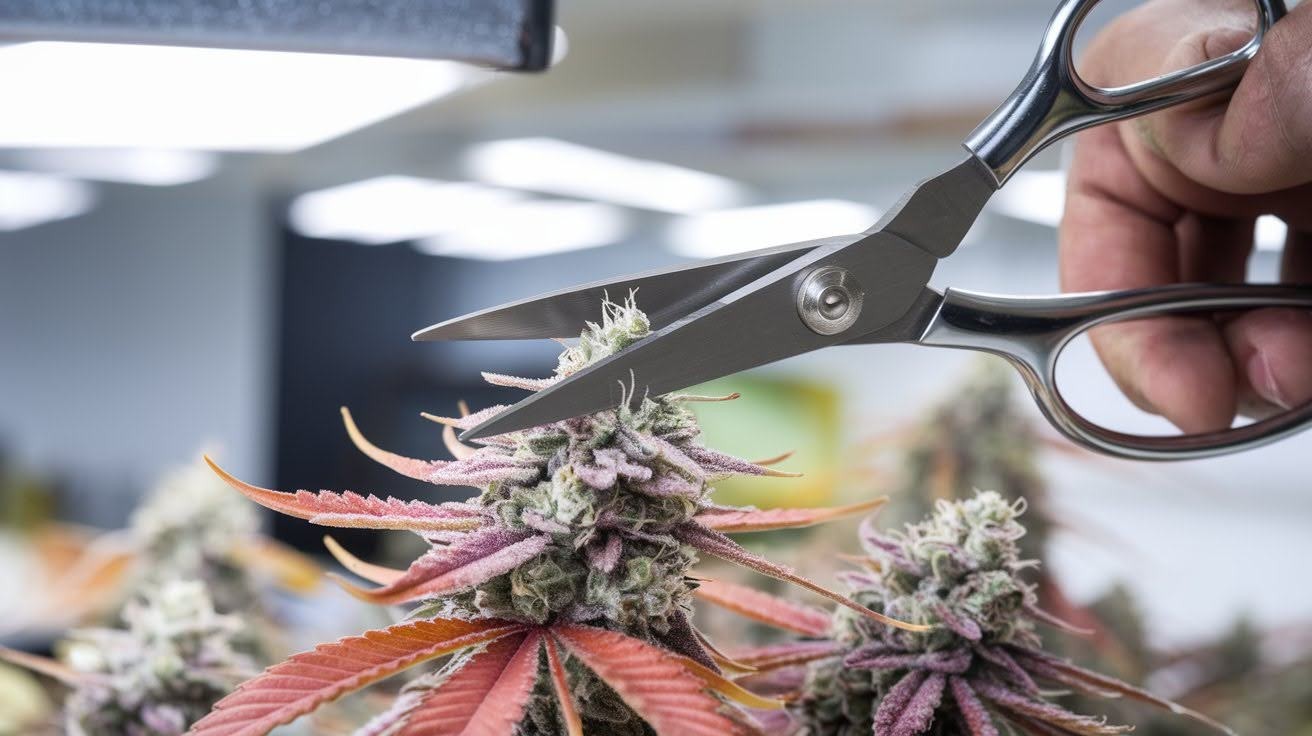
Precision Trimming: Sugar Leaf Management
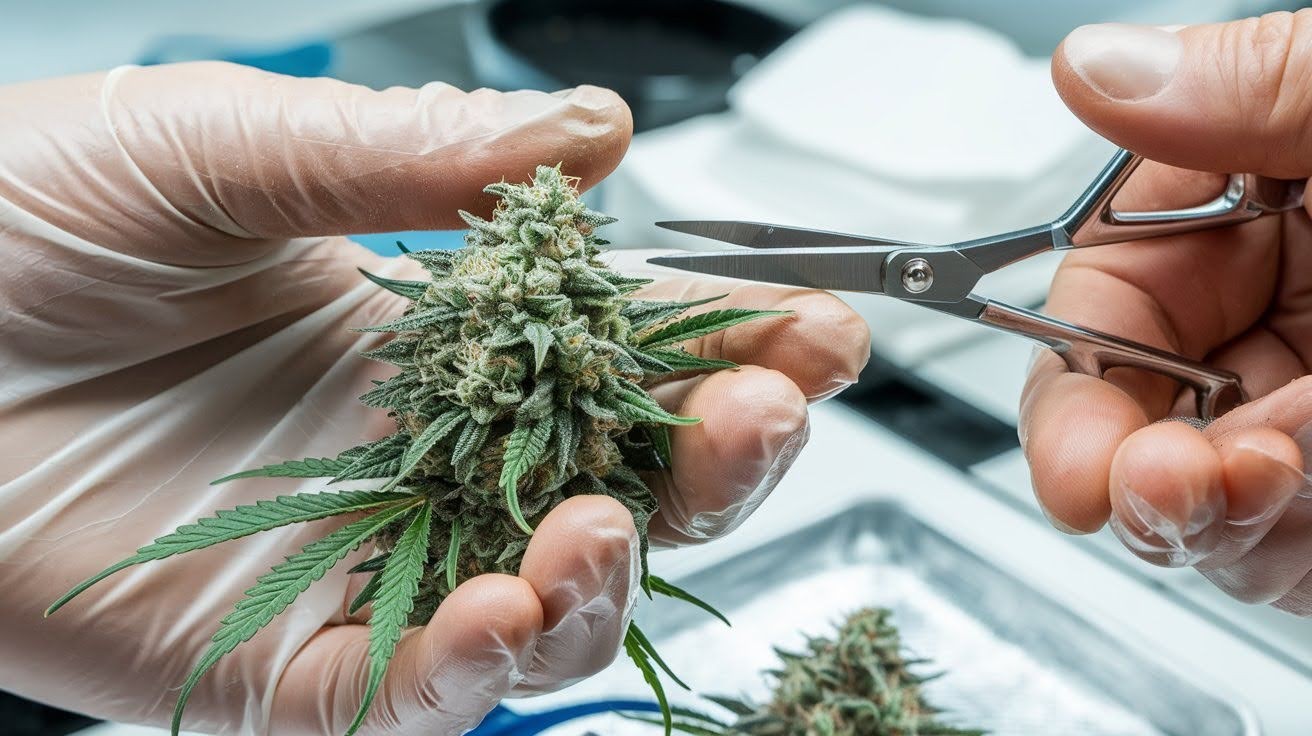
Now comes the tricky part. Sugar leaves hide inside bud structures and require careful attention. One wrong cut here damages your entire bud.
Look for small leaves poking out from between bud clusters. These sugar leaves often have white, frosty tips. They’re easy to spot once you know what to look for.
Always support the bud with your non-dominant hand. Cup it gently while you work. This prevents the bud from moving and tearing.
Cut with small, controlled movements. I use the tip of my scissors to snip just the leaf portion. Leave the stem base intact.
Aim for a flush appearance without going too deep. The goal is smooth buds that look natural, not carved up.
Stop before you go too far. It’s better to leave a tiny bit of leaf than to cut into bud material. You can always trim more later.
Watch for these danger signs: White, sticky residue on your scissors means you’re cutting into trichomes. Brown or damaged bud edges mean you’ve gone too deep.
Final Manicuring Techniques

Shape your buds into smooth, rounded forms. Look for any obvious leaf tips sticking out and clean them up carefully. Know when to stop. Over-trimmed buds look fake and lose potency. Natural texture is better than perfect appearance.
Maintain the bud’s density. Don’t hollow out the center instead, try to remove every tiny leaf. Dense buds are valuable buds. Step back and assess your work. Good trimming looks effortless, not forced.
Advanced Damage Prevention Techniques
Master these techniques and you’ll trim like a pro. These methods separate careful growers from those who rush and ruin their harvest. Small details make huge differences in the final quality.
Gentle Handling Methods
Think of buds as fragile eggs. Support them from underneath while you work. Never squeeze or grip tightly.
Rotate the branch, not the bud. Turn the stem in your hand to access different angles. This keeps buds stable and prevents crushing.
Minimize direct contact with trichome-covered surfaces. Your fingers are the enemy of those crystal structures. Use your tools as extensions of your hands.
Let scissors do the touching, not your fingers. This protects delicate trichomes from oils and pressure. Work in small sections. Handle one small area at a time instead of trying to manage entire branches.
Optimal Cutting Angles and Pressure
Position scissors at 45-degree angles to the stem surfaces. This creates clean cuts that heal faster and look better. Control your cutting pressure carefully. Too much force crushes stems. Too little creates ragged cuts that invite problems.
Preserve natural bud shapes by following their contours. Don’t force buds into unnatural forms.
Never twist your scissors while cutting. Straight cuts prevent tearing and structural damage.
Make decisive cuts. Hesitation leads to multiple cuts on the same spot, which damages tissue.
Keep cuts quick and clean. Slow, sawing motions crush plant matter and create ugly wounds.
Managing Environmental Factors
Room temperature affects everything. Cold conditions make trichomes brittle and likely to break off. Aim for 65-70°F for optimal handling. Humidity matters too. Dehydrated air makes plant material stiff and more rigid to cut cleanly. 50-60% humidity works best.
Proper lighting prevents mistakes. Bright, even light shows you exactly what you’re cutting. Shadows hide essential details. Avoid direct sunlight on your work area. It heats buds and makes trichomes more fragile.
Work during cooler parts of the day when possible. Your hands stay steadier, and plants handle better.
Preventing Common Damage Mistakes
Most trimming mistakes happen because people rush. I’ve watched growers ruin perfect buds by making these avoidable errors. Learn from their mistakes, not your own.
Avoiding Over-Trimming
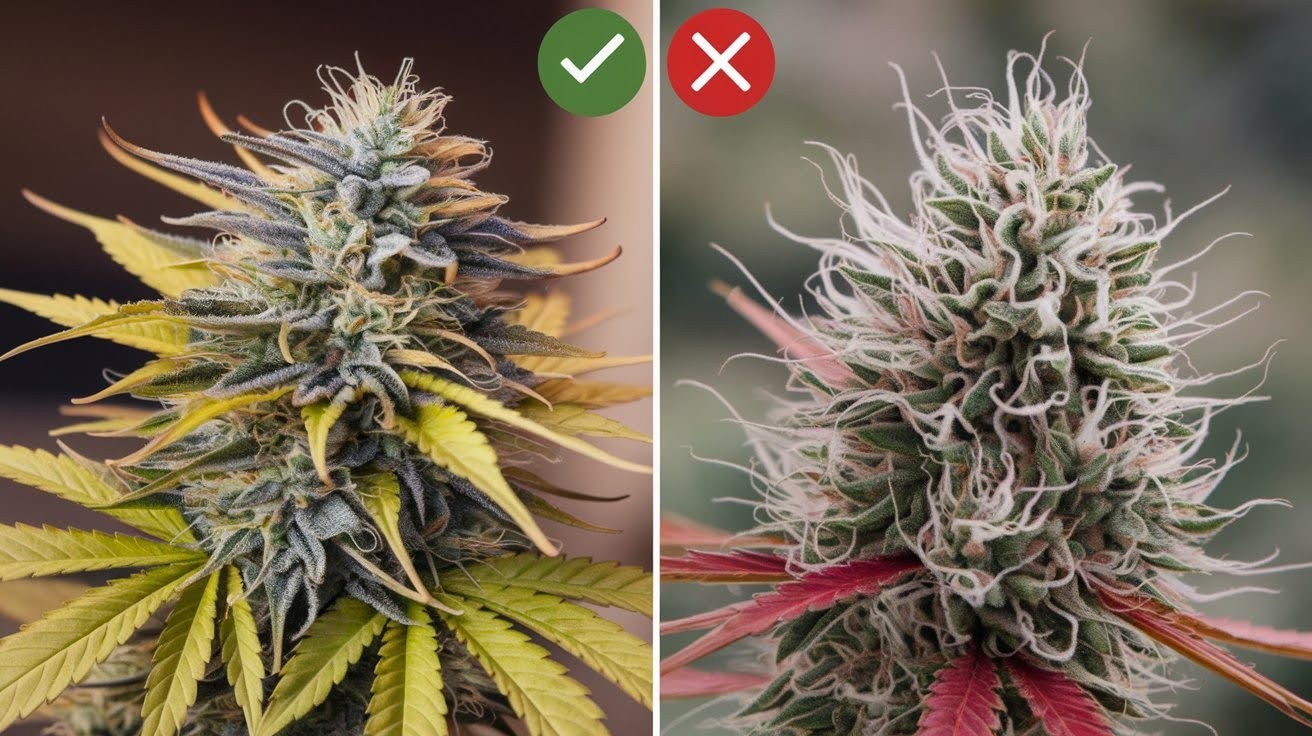
Stop when buds look bare. If you can see through the bud structure, you’ve gone too far. Dense buds are valuable buds.
Balance looks with potency. Pretty doesn’t always mean better. Some sugar leaves contain more compounds than the buds themselves.
Keep frosty sugar leaves that sparkle with trichomes. These add weight and potency to your final product.
Warning signs of over-trimming: Buds look hollow, stems show through, or the natural shape disappears.
Preventing Structural Damage
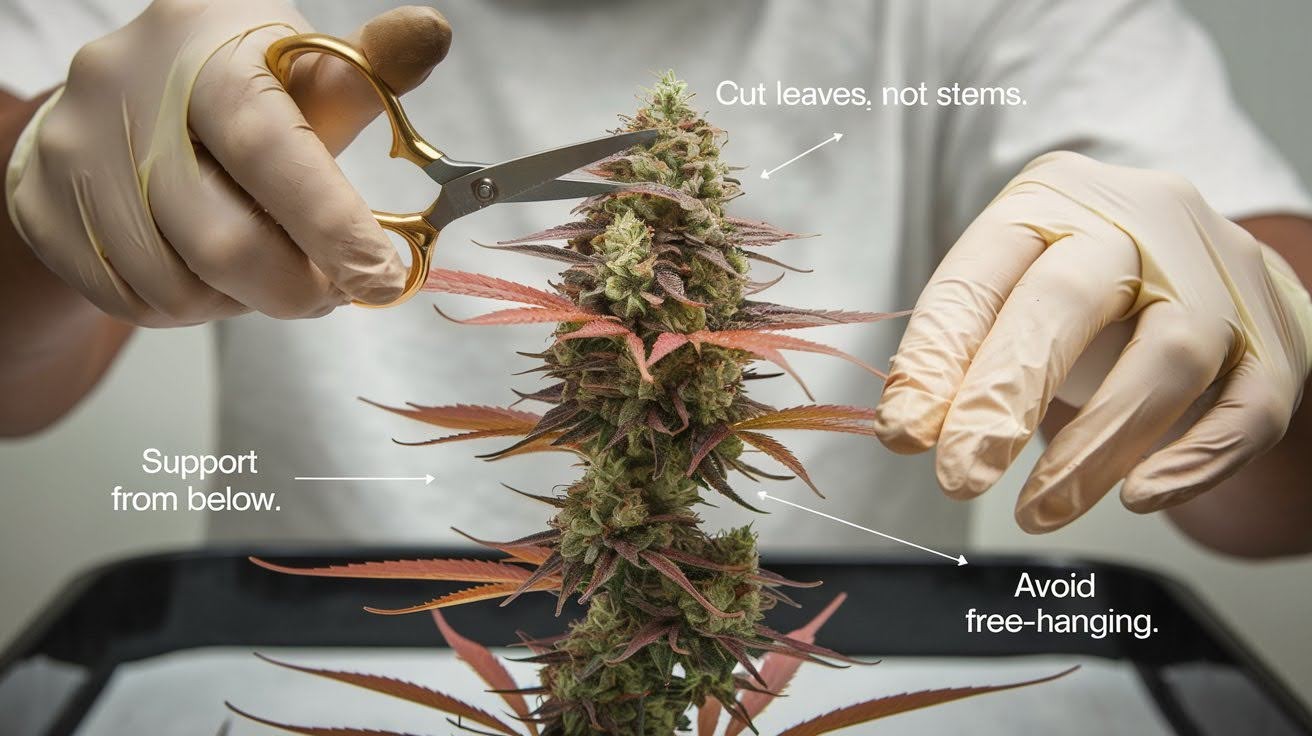
Heavy colas need extra support. Cut them from below while trimming the top. Never let them hang freely.
Avoid cuts that weaken main stems. Cut branches and leaves, not the structural supports.
Watch for crushing signs: Brown spots, wet areas, or flattened sections mean you’re handling too roughly.
Plant stress shows quickly. Wilting, darkening, or unusual flexibility means you need to be gentler.
Maintaining Consistency Without Rushing
Develop a steady rhythm. Consistent movements prevent mistakes and improve results.
Take regular breaks every 30 minutes. Tired hands make sloppy cuts.
Stay focused on quality over speed. One perfect bud beats ten damaged ones.
Conclusion
You now know how to trim cannabis safely without damaging your precious buds. The key is using sharp tools, supporting your buds properly, and taking your time with each cut.
Your trimming fears are behind you. With these techniques, you’ll protect those valuable trichomes while creating clean, professional-looking buds.
Remember to work in good lighting, take breaks when your hands get tired, and always prioritize bud quality over speed. Practice makes perfect. Each plant you trim will build your confidence and improve your skills. Start with these basics, and you’ll develop your efficient style.
Found this helpful? Share your trimming experiences in the comments below. Other growers love hearing about techniques that work in real-world situations.
Happy trimming!
Frequently Asked Questions
What tools do I need to trim cannabis without damaging buds?
You need sharp scissors with thin blades (like Fiskars), disposable gloves, multiple trays for organization, and isopropyl alcohol for cleaning tools. Avoid dull scissors that crush plant material, and always keep backup tools ready.
When should I trim my cannabis plants?
Trim after harvest when plants are dry but not brittle. Wait until smaller stems snap cleanly, but main stems still bend slightly. This timing prevents trichome damage while making cutting easier.
How do I avoid cutting too much material off my buds?
Focus on removing fan leaves first, then carefully trim sugar leaves that stick out. Stop when buds look natural and dense. Over-trimmed buds appear hollow and lose potency.
What’s the difference between wet and dry trimming?
Wet trimming happens immediately after harvest while plants are fresh. Dry trimming occurs after drying. Dry trimming is gentler on trichomes but takes more time and skill.
How can I tell if I’m damaging trichomes while trimming?
Watch for sticky residue on scissors, trichomes falling like dust, or brown edges on buds. These signs mean you’re handling your tools too roughly or that they need cleaning.


