
So you’ve grown your first crop, congrats! But before you light up in celebration, there’s one critical step left: drying and curing. I learned the hard way that if you rush this stage, you’ll end up with buds that burn too fast, taste harsh, or lose potency.
Over the past decade, I’ve refined my post-harvest process through trial, error, and a lot of research. What I’ll share here isn’t theory, it’s what works in real-world grow setups, from closets to greenhouses. In this article, you’ll get a clear, step-by-step guide to drying and curing properly.
I’ll explain optimal temperature and humidity levels, how to avoid mold, and how to store your harvest so it stays fresh for months. I’ve tested these methods myself and also compared them with expert advice from trusted cultivation manuals and pro growers.
Your hard work deserves a great finish. Let’s make sure you get it.
Understanding the Fundamentals
Mastering basic principles creates the foundation for success these core concepts guide every decision you’ll make throughout the process.
What is Cannabis Drying?
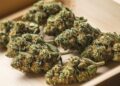
Drying is the first step after harvest. It’s pretty straightforward you’re removing water from your buds. Think of it like making jerky. You take something wet and make it dry enough to store safely.
Here’s why this matters: Wet cannabis is a breeding ground for nasty stuff. Mold loves moisture. So do bugs and bacteria. Remove the water, and you remove the problem.
The process typically takes 5 to 10 days. Environmental conditions control the timeline. Hot, dry air works faster than cool, humid conditions. I learned this the hard way when my first batch got moldy after just three days.
What is Cannabis Curing?

Curing happens after drying. This is where patience pays off. While drying removes water quickly, curing removes it slowly and carefully. Think of it as aging wine or cheese.
During curing, several important changes occur: Chlorophyll breaks down, eliminating the harsh, grassy taste. Terpenes develop their full complexity, resulting in a better flavor and aroma.
Cannabinoids reach their peak potency levels. The difference is huge. Properly cured cannabis smokes smoother and hits harder than rushed material. Most people skip this step. Don’t be like most people.
Why Both Processes Matter
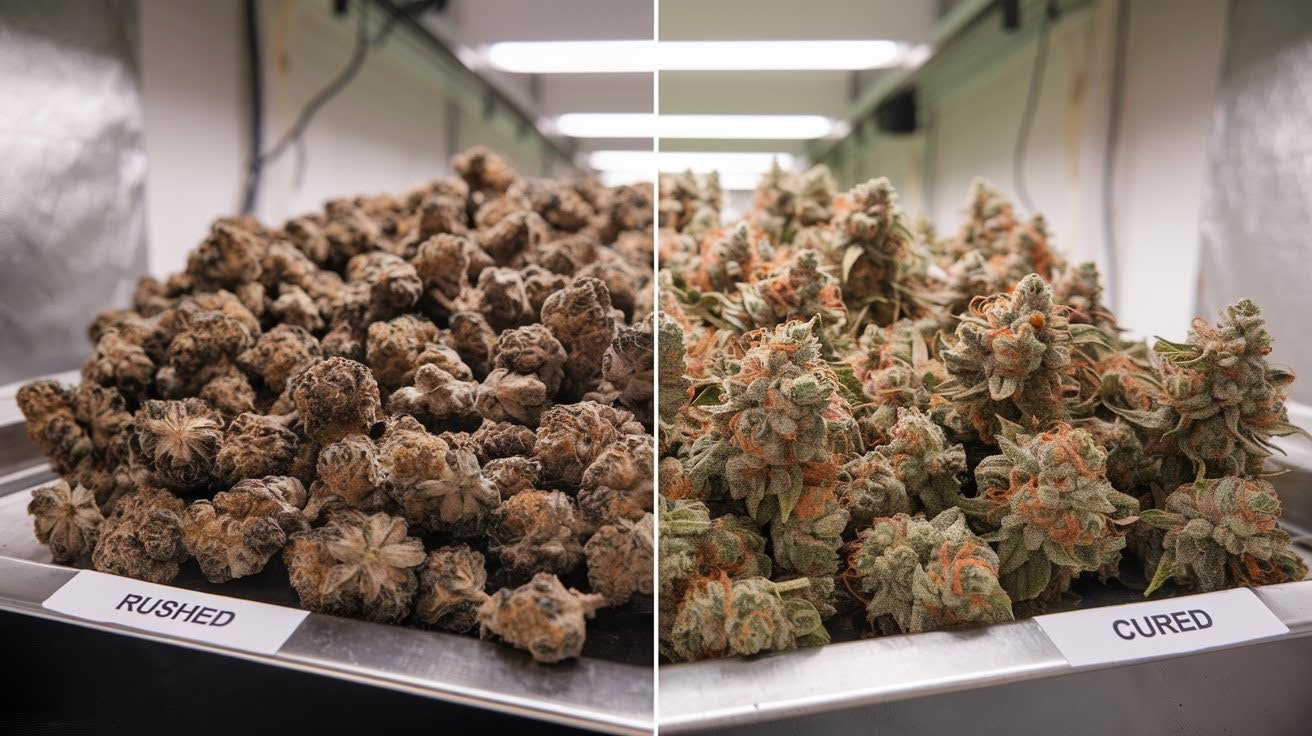
Skip either step and you’ll regret it. Trust me on this. Proper drying and curing work together to create a superior product. The flavor becomes richer and more complex. Potency increases as compounds stabilize.
Your smoke will be much smoother, no more coughing fits. Plus, well-processed cannabis stays fresh for months instead of weeks. I’ve seen people waste entire harvests by rushing these steps.
Essential Equipment and Setup
The right tools and proper setup determine your success from day one. Invest in quality equipment that grows with your skills.
Must-Have Equipment for Beginners
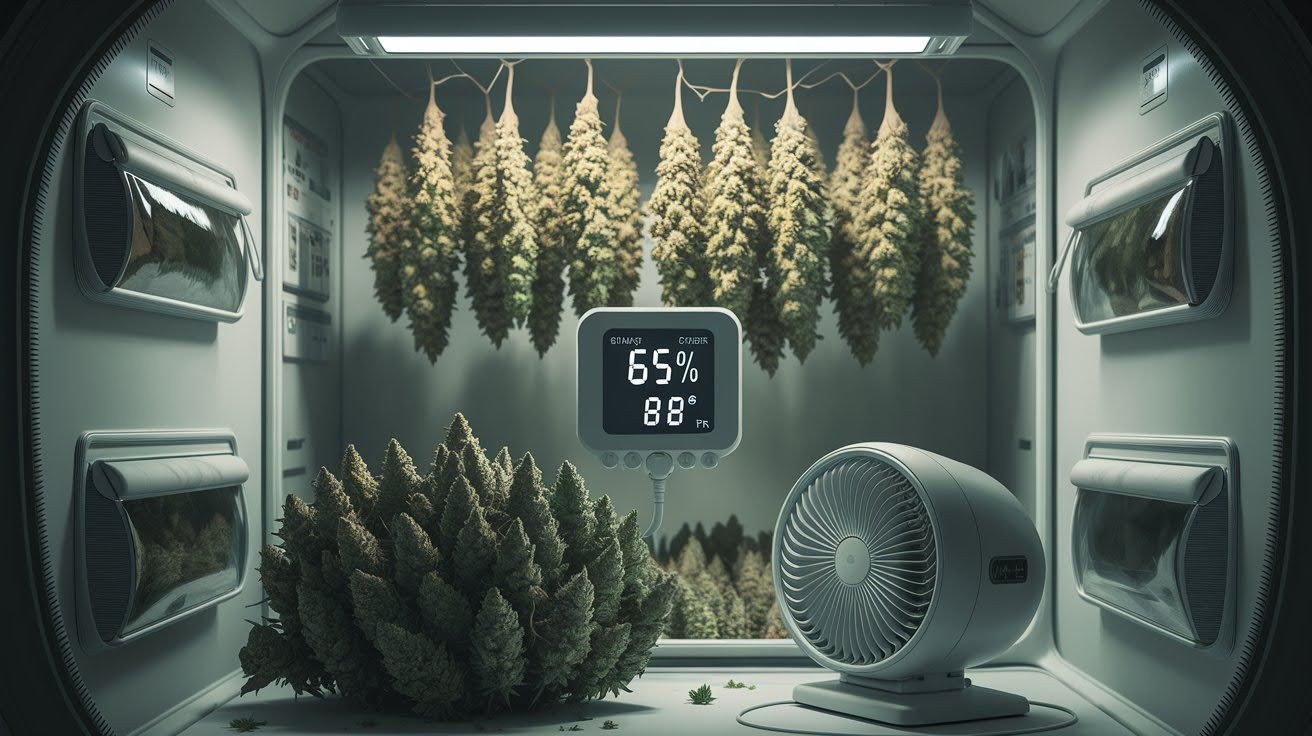
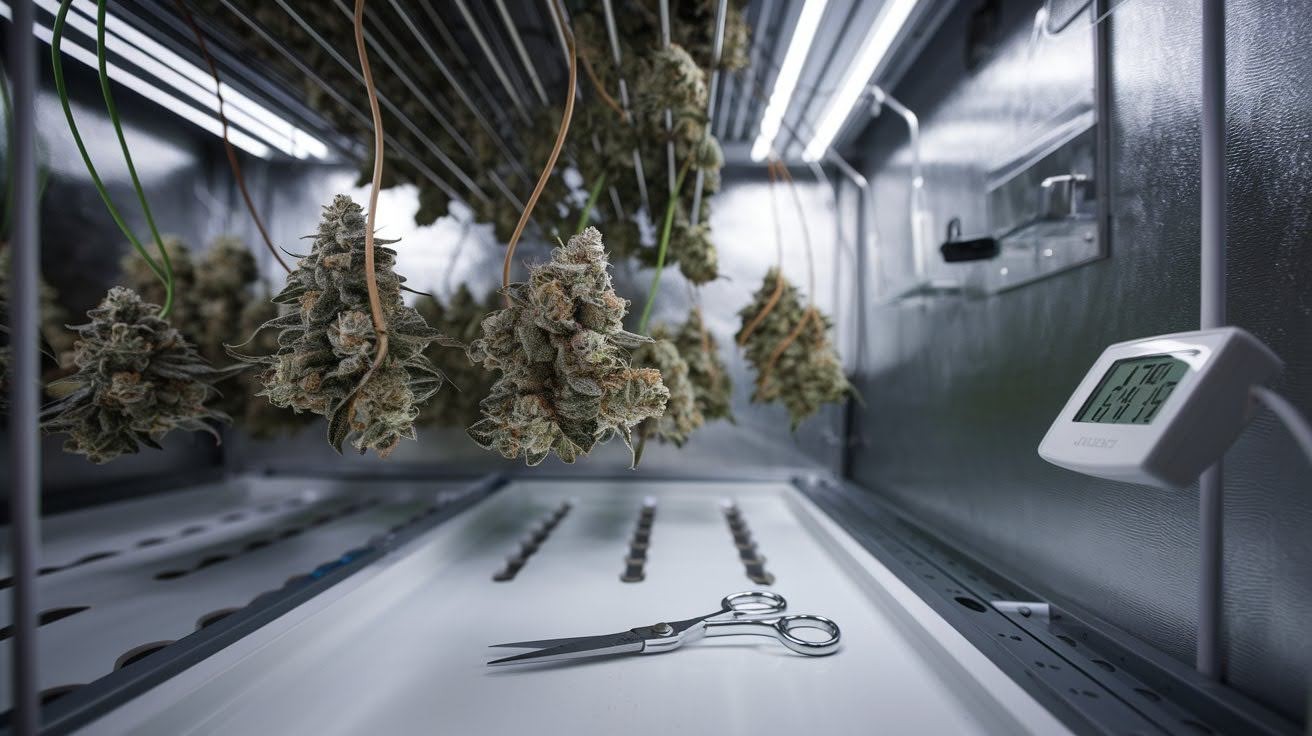
You don’t need fancy gear to get started. Keep it simple. Here’s what matters: Drying racks or a strong string for hanging your branches. Good airflow prevents problems before they start.
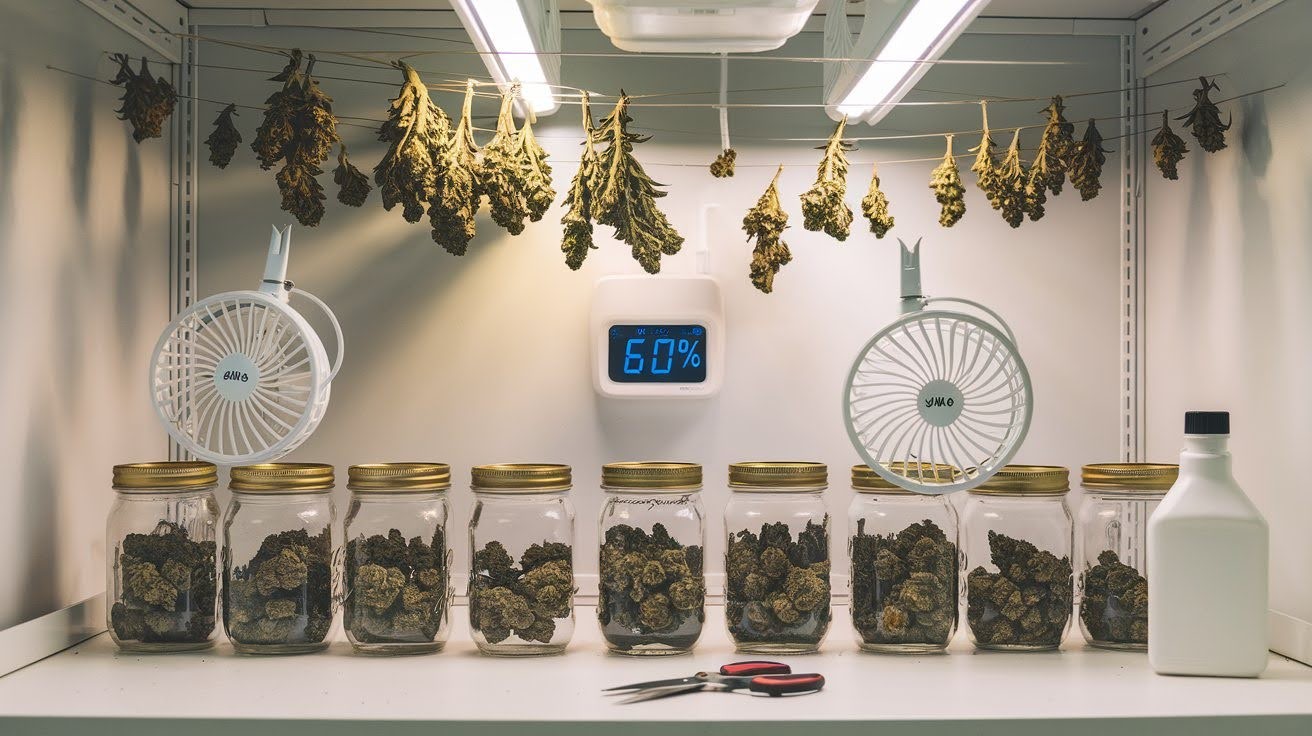
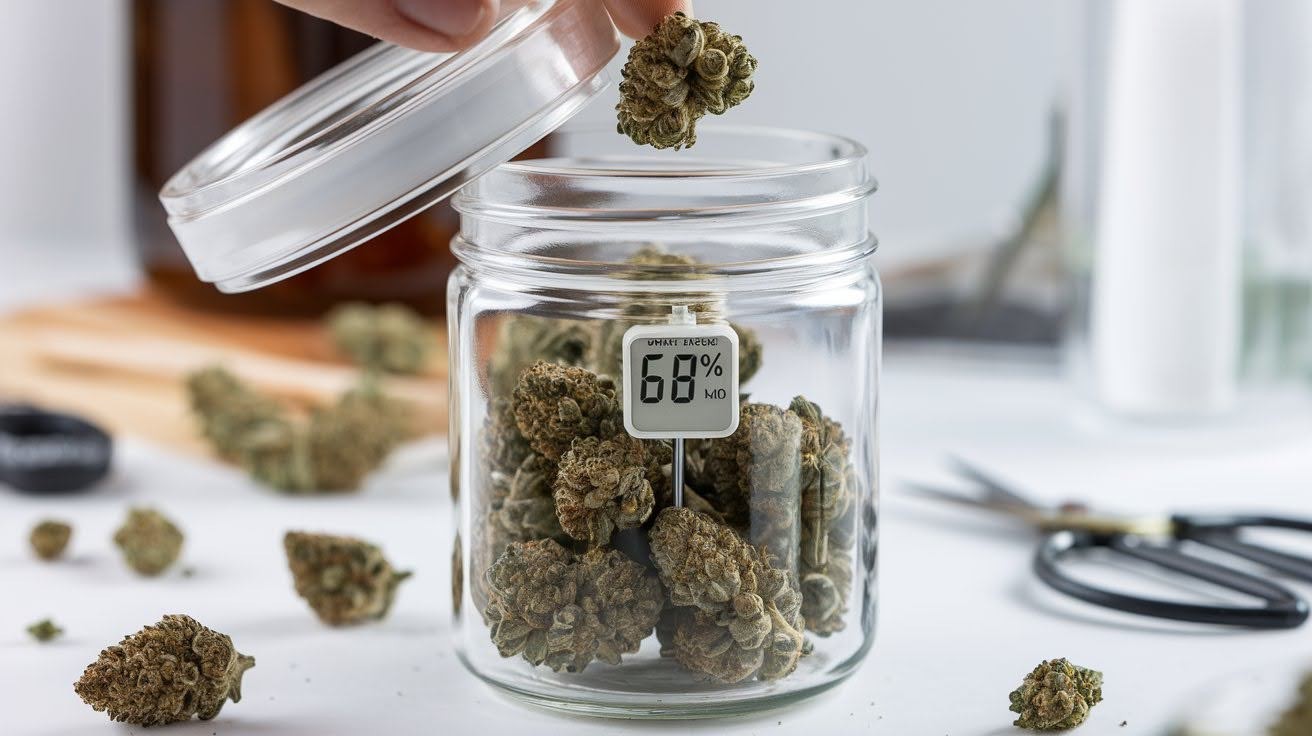
Glass mason jars, available in 16-oz and 32-oz sizes, are the gold standard for curing. Plastic containers will ruin your work. Sharp trimming scissors and isopropyl alcohol for cleaning them. Dirty tools spread contamination fast.
A hygrometer measures humidity levels. This isn’t optional. Guessing leads to disaster. I learned this after losing my second harvest to mold. Small fans for gentle air movement work perfectly. Just don’t blow air directly on your buds.
Creating the Ideal Environment
Temperature and humidity control everything. Get these wrong and nothing else matters.
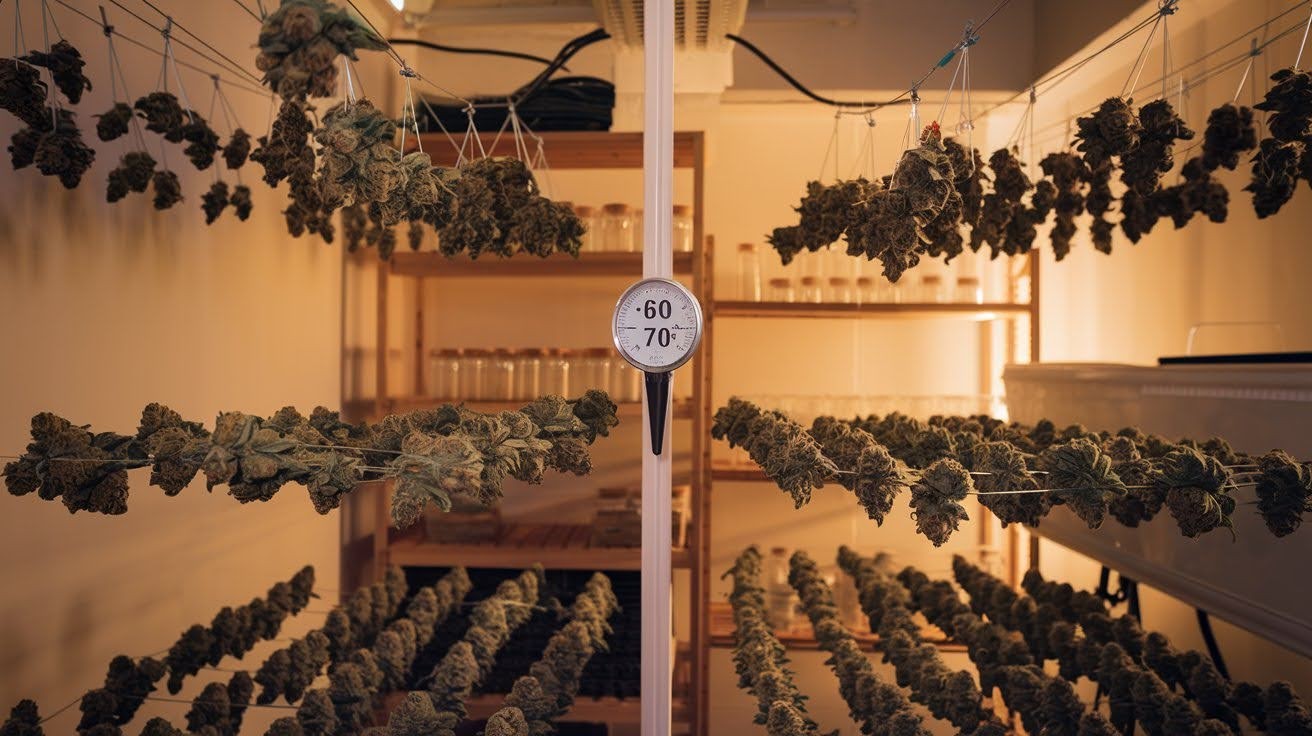
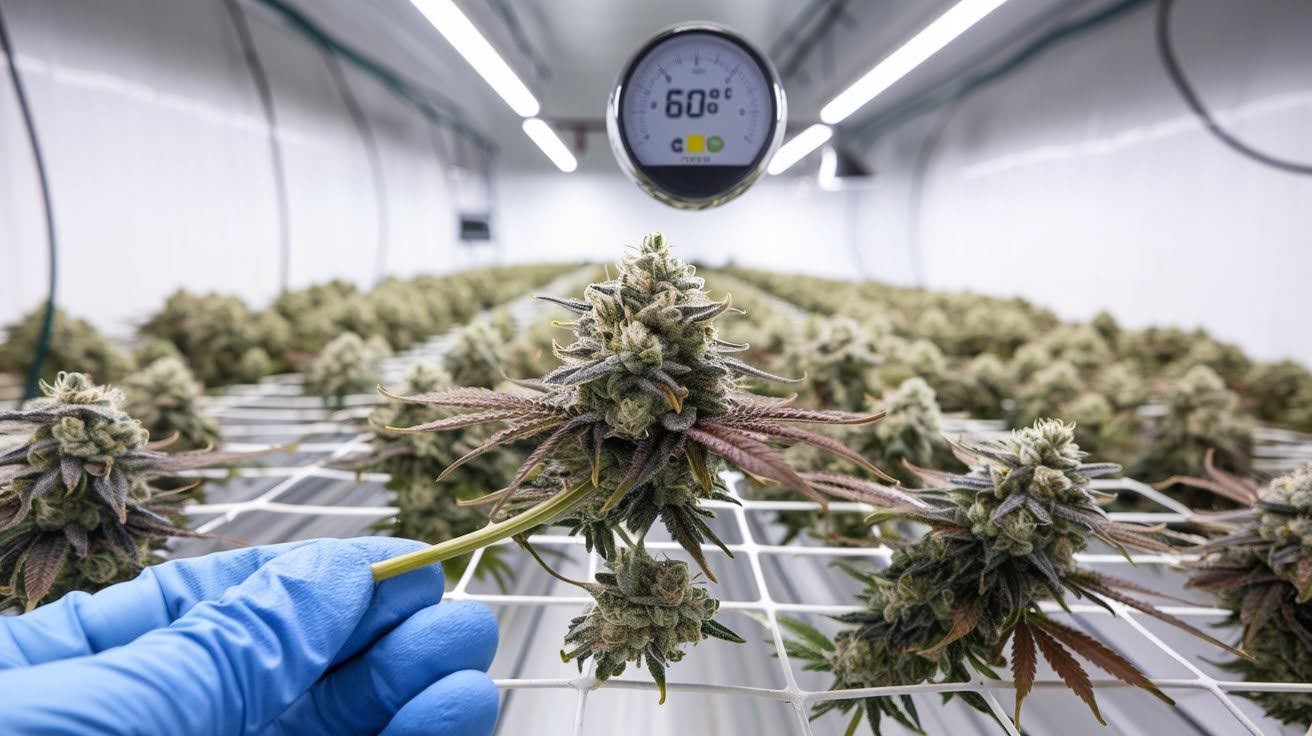
For drying, maintain a temperature of 60-70°F with a relative humidity of 45-55%. Curing requires a slightly higher humidity level, ranging from 55% to 65%.
Darkness protects your cannabinoids from breaking down. Light is the enemy here. Your space needs fresh air circulation, but avoid drafty areas. Clean environments prevent contamination issues.
Here’s a pro tip: Grow tents work great for controlled conditions. They’re affordable and provide complete control over temperature, humidity, and airflow. I use mine year-round regardless of the weather.
The Complete Drying Process
Proper drying transforms fresh buds into potent, flavorful cannabis rushing this critical stage ruins months of careful growing and cultivation work.
Preparation and Initial Setup
Start with clean hands and clean tools. This prevents contamination right from the beginning. Gently trim away the large fan leaves. Don’t go crazy here, you’re not doing a final trim yet. Simply remove the obvious items that hold extra moisture.
Handle your buds with care, as if they were made of glass. Those tiny trichomes break off easily, and each one you lose is potency down the drain. Set up your workspace beforehand. Clean surfaces, sterilized scissors, and good lighting make everything easier.
Two Main Drying Methods
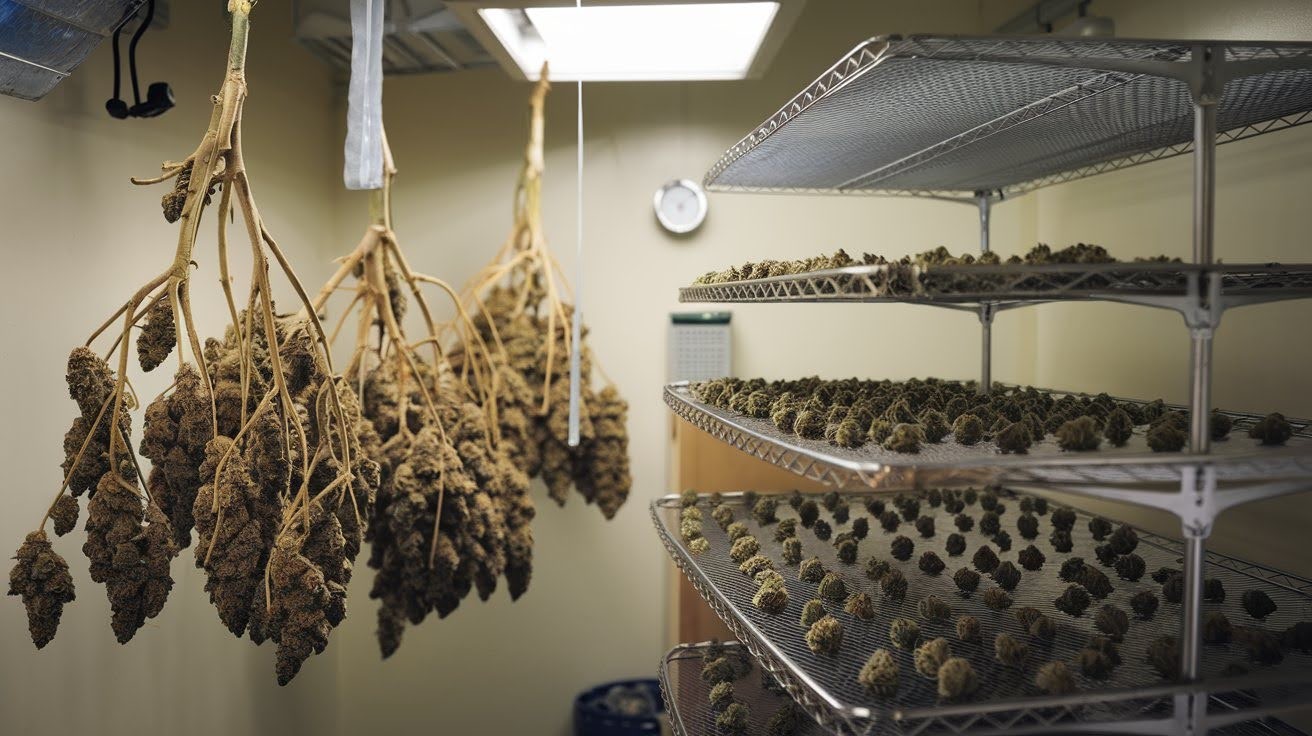
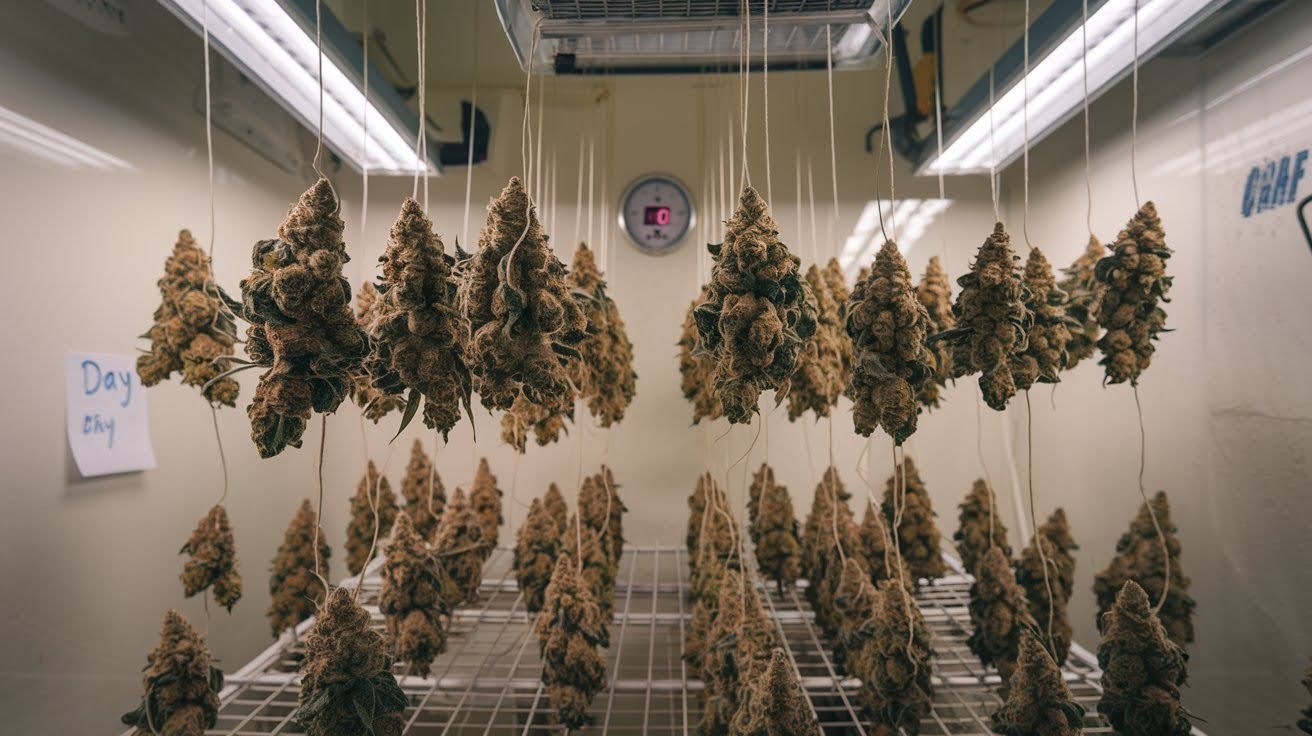
You have two solid options here. Upside-down hanging works best for whole plants or big branches. It’s slower but requires less daily attention. Just hang them up and monitor conditions.
Rack drying suits individual buds perfectly. The process moves faster, but you’ll need to rotate your buds daily to prevent them from developing flat spots. I prefer hanging for larger harvests. Less work, better results. Choose based on your space and the amount of time you can dedicate to checking on things.
Step-by-Step Drying Instructions
Spacing matters more than you think. Hang your branches with at least 2 inches between them. Crowded buds create humid pockets that mold loves to grow in. Check your setup twice daily. Look for signs of mold, unusual odors, or excessively dry areas. Consistency wins over perfection.
Your hygrometer should remain in the sweet spot we discussed earlier. Timeline expectations: Most harvests need 7 to 10 days. Environmental conditions control this completely. Don’t rush based on calendar dates.
Here’s the test that works: Bend a small stem near the bud. It should snap cleanly with a crisp sound. If it bends or feels rubbery, keep waiting. The buds themselves should feel dry on the outside but still have slight moisture inside. Think of a fresh pretzel, crispy on the outside, soft on the inside.
I used to guess at readiness. Big mistake. The stem test saves you from starting the curing process too early.
Mastering the Curing Process
Curing transforms dried cannabis into a premium product this slow process develops flavors, smoothness, and potency that separates good buds from great.
Transitioning from Drying to Curing
Timing this transition perfectly makes all the difference. Your buds passed the stem snap test, but that’s just the first checkpoint. The exterior should feel dry to the touch. Inside, there should still be some moisture content, not wet, just slightly soft. Think of a good bagel.
If your hygrometer reads 60-65% humidity after squeezing a bud in a sealed container for 10 minutes, you’re ready to start curing. Too dry? You missed the window. Too wet? Give it another day or two.
Container Preparation and Filling
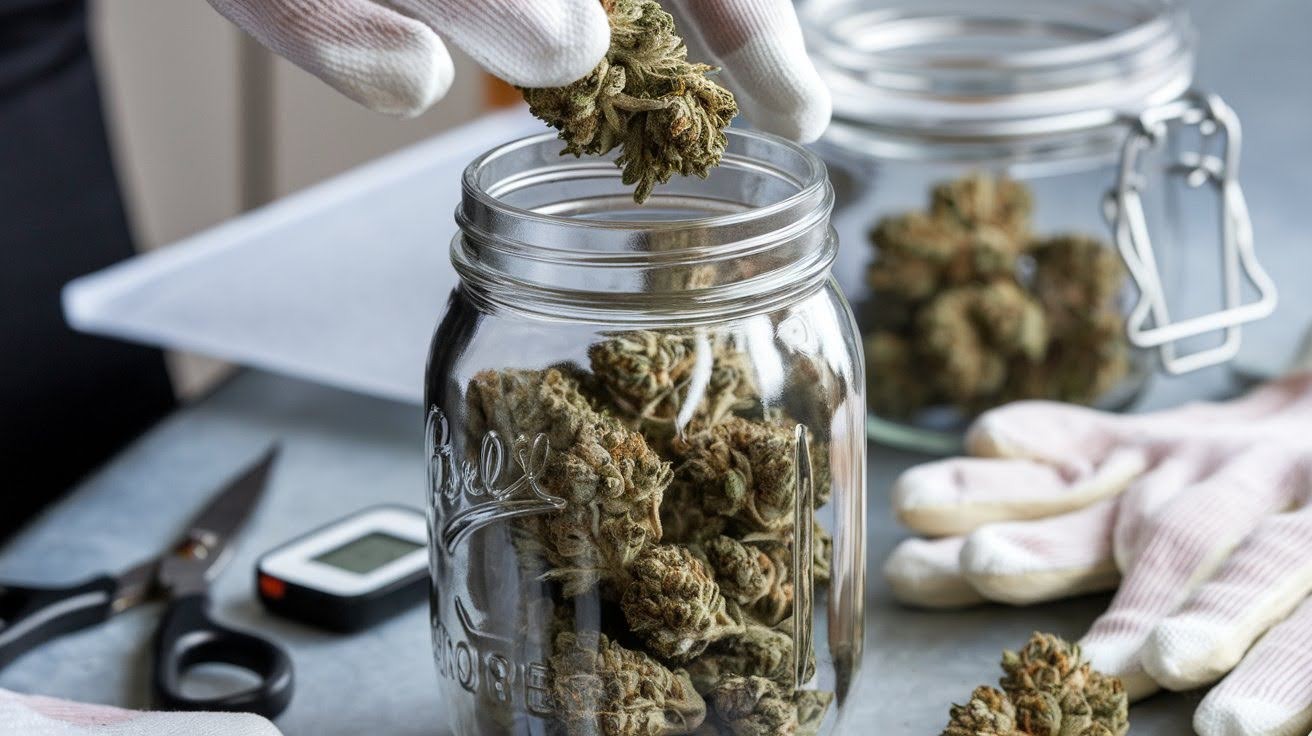
Fill your mason jars to a maximum of 75% capacity. Your buds need room to breathe. Cramming them in tight creates dead air pockets. Don’t press or compact anything. Gentle placement only.
Drop a small hygrometer into each jar before sealing. This provides real-time readings, eliminating the need for guesswork. I learned this after ruining my third batch with overpacked jars. Space equals success.
The Critical Burping Process
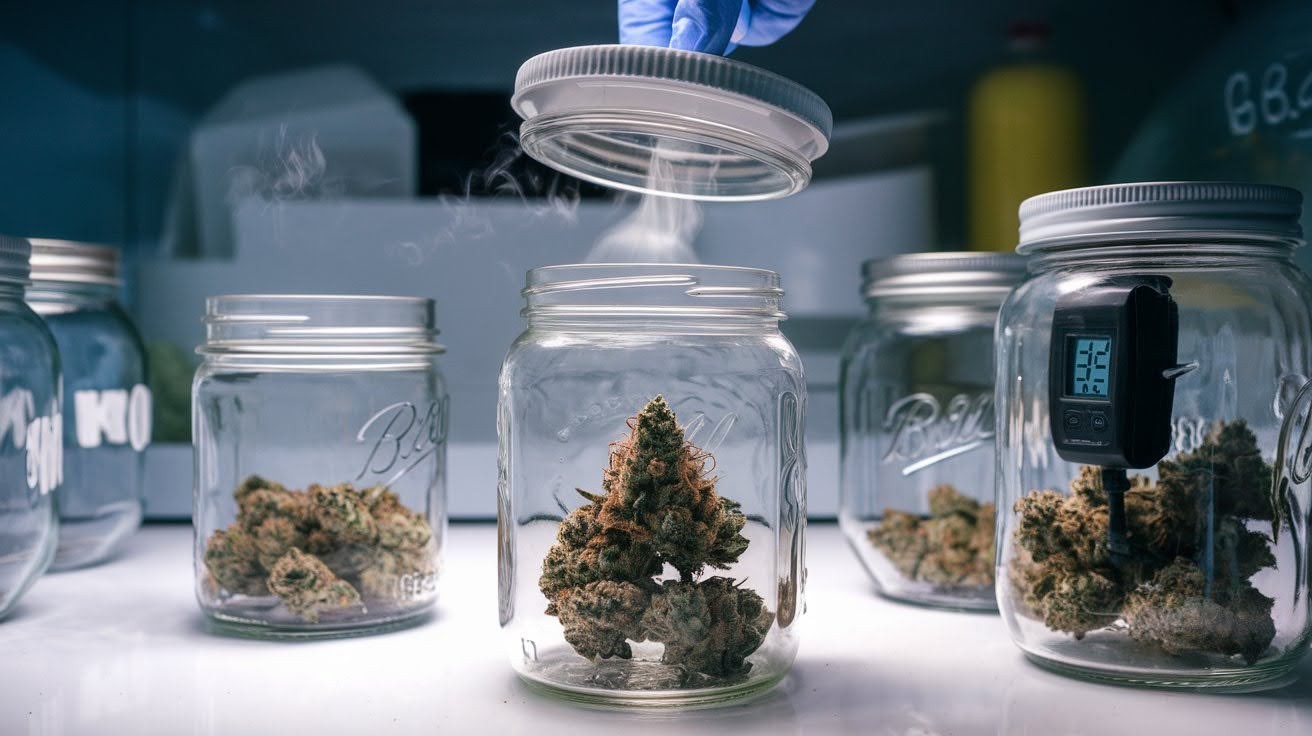
Week one is make-or-break time. Open those jars once or twice daily. Your buds are still releasing trapped moisture. During weeks 2-4, you can relax a bit. Burp every few days as things stabilize. Don’t get lazy, though.
After the first month, weekly burping keeps the process moving forward. Each session should last between 5 and 15 minutes. Give your buds some fresh air, then seal them back up. I used to forget about burping. My cannabis paid the price.
Monitoring Curing Progress
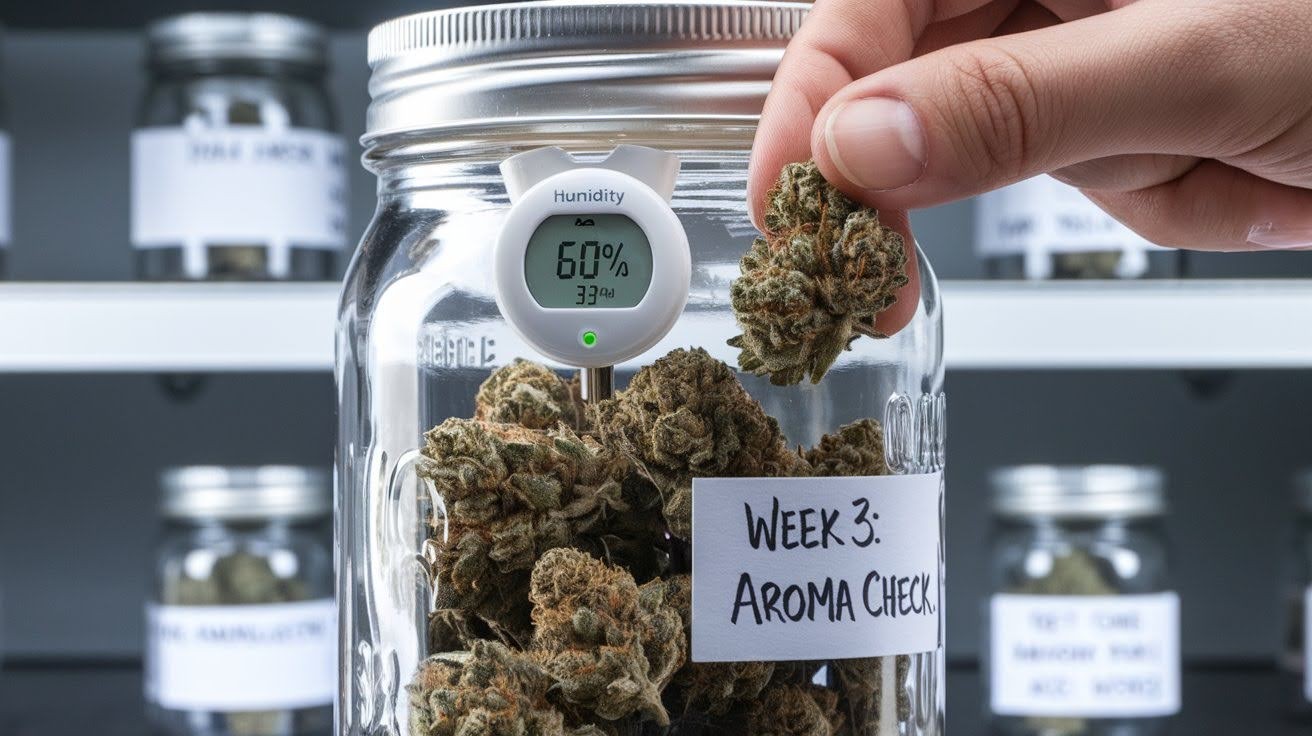
Maintain a humidity level between 55% and 65%. Higher means mold risk. Lower stops the curing process cold. Your buds should feel slightly spongy when squeezed gently. Not wet, not bone dry.
The smell changes dramatically during curing. That grassy, harsh odor fades. Complex, rich aromas take their place. Timeline reality check: Two to three weeks gets you decent quality. Four to eight weeks creates premium results.
Most people stop too early. Patience pays off here.
Top Beginner Tips and Common Mistakes
New growers make predictable errors that waste time and ruin harvests. These essential tips prevent costly mistakes and accelerate learning.
- Master the art of patience: Quality cannot be rushed. Taking time with each stage produces superior results compared to hurrying through the process.
- Monitor your setup consistently: Check all equipment and conditions daily during the initial weeks to catch any issues early.
- Maintain stable environmental conditions: Avoid temperature and humidity fluctuations that stress plants and reduce quality.
- Minimize physical contact: Handle buds sparingly and gently, as each touch removes valuable trichomes and reduces potency.
- Prioritize cleanliness: Keep all tools, surfaces, and containers spotless. Contamination can destroy months of careful cultivation work.
- Focus on consistency: Regular, steady care practices yield better results than sporadic intensive attention.
These fundamental practices form the foundation of successful cultivation, where attention to detail and steady commitment produce the best outcomes.
Most Common Beginner Mistakes
- Avoid rapid drying method: High heat and direct fan exposure create harsh, low-potency cannabis that lacks smoothness and flavor.
- Never skip burping sessions. Regular jar opening prevents mold formation. Use phone reminders to maintain this crucial schedule.
- Leave space in storage containers: Overpacked jars block essential airflow, leading to uneven curing and potential mold issues.
- Store in dark containers. Light exposure breaks down cannabinoids over time. Opaque storage preserves potency better than clear glass.
- Control environmental stability: Temperature and humidity fluctuations stress cannabis and degrade quality throughout the curing process.
- Learn from common beginner errors: Most new growers make multiple storage and drying mistakes that are easily preventable with proper knowledge.
- Plan for climate challenges. Extreme weather conditions can destroy months of work if your setup lacks proper environmental controls.
These storage and drying fundamentals separate amateur results from professional-quality cannabis that maintains its potency and smoothness over time.
Quick Problem Solutions
- For overly dry buds: Add a small humidity pack to jars for 24 hours, then remove once moisture levels return to normal.
- For musty odors: Remove affected buds from containers immediately and spread them on drying racks with increased air circulation.
- For slow curing progress: Raise the temperature slightly, keeping it below 70°F to speed the process safely.
- For potency loss: Check light exposure and temperature control first, as both rapidly degrade cannabinoids.
- For mold prevention, Act quickly at the first signs, as mold spreads rapidly through stored cannabis.
- For stabilizing conditions: Monitor and adjust environmental factors promptly to prevent small problems from becoming major losses.
These immediate response techniques can save entire harvests when problems arise during the curing process.
Quality Indicators and When to Enjoy
Knowing when your cannabis reaches peak quality saves you from smoking harsh, underdeveloped buds or waiting unnecessarily for perfection.
Signs of Properly Cured Cannabis
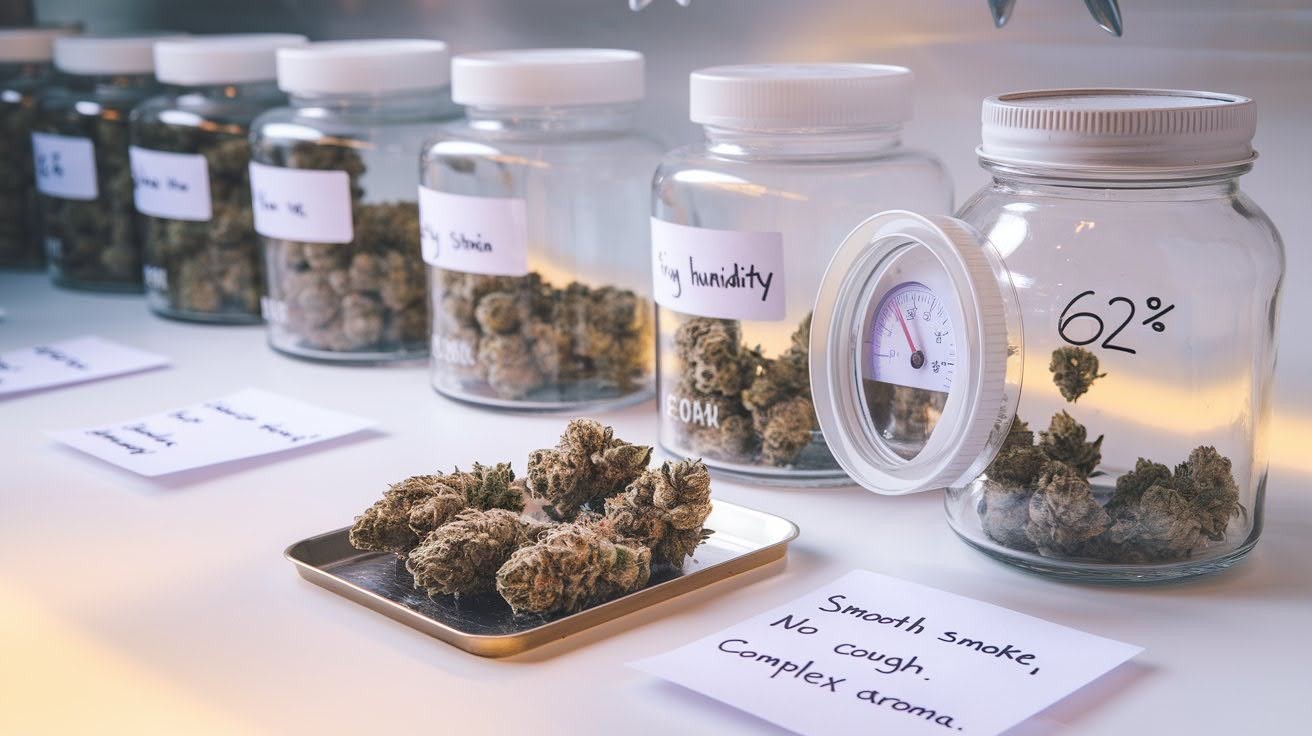
You’ll know it when you smoke it. Properly cured cannabis goes down smoothly. No coughing or throat burn. The smell gets richer and more complex over time. That grassy, harsh odor disappears completely.
Each strain develops its unique scent profile. Flavor follows the same pattern. Notes you never noticed before start coming through clearly. Your buds should break apart easily in your fingers but still hold together. Not crumbly, not sticky, just right.
I remember my first successful cure. The difference was like night and day compared to rushed material.
Storage for Long-Term Quality
Store your glass containers in a cool, dark place. Light and heat are still your enemies. Maintain temperatures below 70°F with humidity levels between 55% and 62%. This prevents mold while preserving quality.
Label everything with strain names and dates. Trust me, you’ll forget otherwise. Handle your stored cannabis as little as possible. Every touch removes precious trichomes. Properly stored, cured cannabis stays good for over a year.
Conclusion
Drying and curing for beginners doesn’t have to be complicated. You now have everything needed to transform your fresh harvest into smooth, potent cannabis. Remember the key points: maintain proper temperature and humidity, be patient with timing, and monitor your progress daily. These fundamentals work every time.
Your first successful cure will feel amazing. That harsh, grassy taste will be gone, replaced by the complex flavors your strain was meant to have. Take your time with each step. Quality beats speed every single time.
Do you have questions about your specific setup or encountered issues during the process? Drop a comment below. I love helping fellow growers troubleshoot their curing process.
Share this guide with anyone starting their first course. We all need to stick together.
Frequently Asked Questions
How long does the drying and curing process take for beginners?
Drying takes 7-10 days, while curing requires a minimum of 2-8 weeks. Basic quality develops in 2-3 weeks, but premium results need 4-8 weeks of patient curing.
What temperatures and humidity levels should I maintain during drying and curing?
For drying: 60-70°F with 45-55% humidity. For curing, maintain the same temperature but increase humidity to 55-65%. Use hygrometers to monitor conditions accurately.
How do I know when my buds are ready to move from drying to curing?
Stems should snap cleanly when bent, and buds should feel dry on the outside with slight moisture on the inside. Place in a sealed container, the humidity should read 60-65%.
What’s the biggest mistake beginners make during drying and curing?
Rushing the process by using excessive heat or skipping daily burping sessions. Both lead to harsh taste, mold problems, or reduced potency in the final product.
Can I fix buds that dried too fast or got too dry?
Add humidity packs temporarily to jars for overly dry buds. However, prevention works better than fixes maintain proper conditions from the start.


