
Spider mites are one of the most frustrating problems a cannabis grower can face. I’ve dealt with them many times over the past eight years, and I know how quickly they can turn healthy plants into a mess. If you’re seeing yellow spots or fine webbing, you’re likely dealing with them now. This guide will help you act fast.
You’ll learn how to spot spider mites early, understand how they spread, and use reliable methods to stop them before they ruin your crop. The advice here comes from hands-on experience, not guesswork. Every tip has been tested in real grow spaces with real results.
You’ll also find prevention tips that save time and stress later. By the end, you’ll know exactly how to handle spider mites and keep your plants strong, healthy, and on track for a successful harvest.
What Are Spider Mites?
Here’s what you’re dealing with. Spider mites aren’t insects at all. They’re eight-legged arachnids, tiny spiders that happen to love your cannabis plants.
Adult mites are only 1/50 of an inch long. That’s smaller than the period at the end of this sentence. Juveniles are even tinier. You can’t see them with your naked eye.
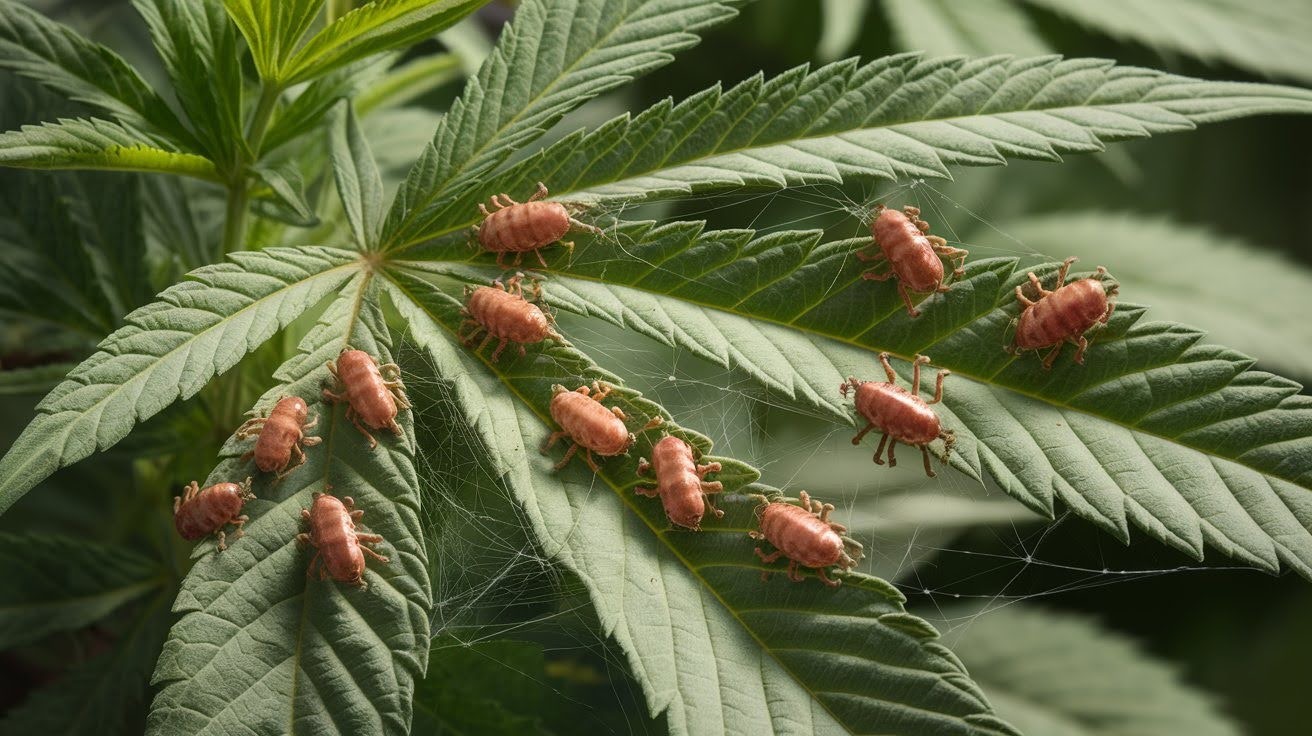
This is why so many growers miss early infestations. By the time you notice damage, thousands of mites are already feeding on your plants. The two-spotted spider mite (Tetranychus urticae) causes most problems for cannabis growers.
These little destroyers have red or yellow bodies with two dark spots. But here’s the scary part: These mites don’t just attack cannabis. They feed on over 200 different plant species.
If you have a garden, houseplants, or even weeds nearby, mites can jump from those plants to your cannabis. That’s why prevention matters so much.
Why Spider Mites Are Cannabis Growers’ Worst Nightmare
The numbers will shock you. A single mature female spider mite can produce up to one million offspring in less than a month. That’s not a typo. One million.
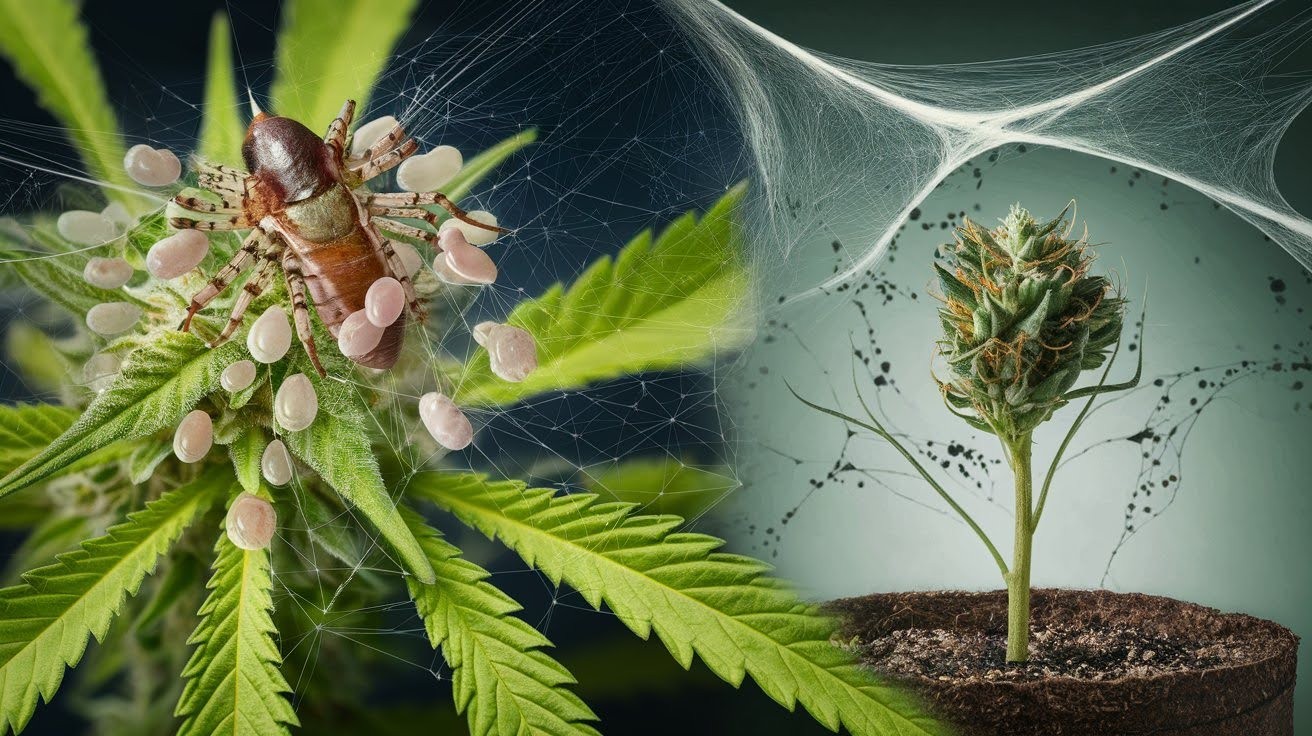
Here’s how they attack your plants: Spider mites pierce individual plant cells with needle-like mouthparts. They suck out essential fluids your cannabis needs to survive. Each feeding session weakens your plant cell by cell.
Then comes the webbing. Mites spin fine silk mesh all over your leaves and buds. This webbing traps moisture and creates perfect conditions for mold and bacteria.
But wait, it gets worse. These mites adapt to pesticides faster than you can buy new ones. Growers call resistant populations “borg” mites because they seem impossible to stop. The final blow?
Spider mites can kill entire plants overnight. Young, tender plants are especially vulnerable. I’ve seen healthy seedlings turn into brown, crispy husks in 24 hours. That’s why early detection saves your crop.
Early Detection and Identification
Catching spider mites early saves your entire crop. Here’s how to spot these tiny destroyers before they cause serious damage.
Visual Signs of Spider Mite Infestation

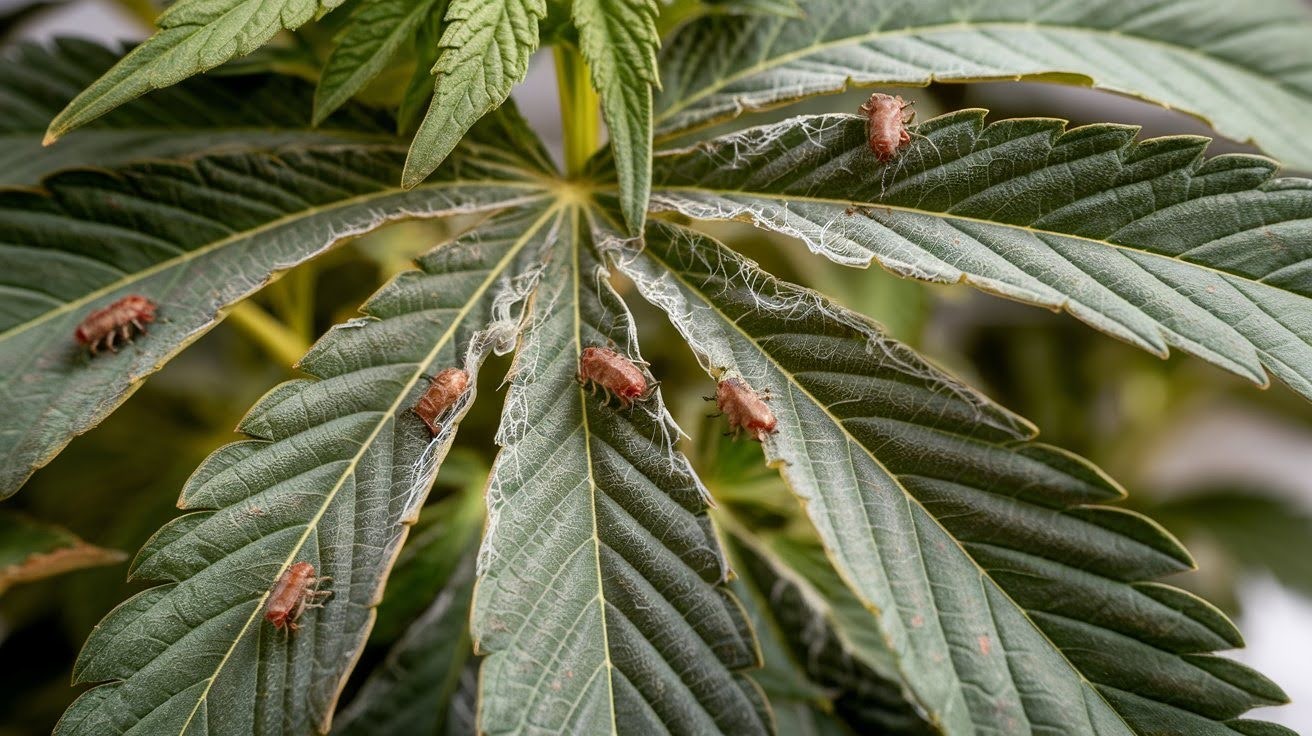
You need to know what you’re looking for. The first sign is small white spots on your leaf surfaces. These aren’t random marks, they’re feeding wounds where mites have sucked out chlorophyll.
Check the undersides of leaves carefully. That’s where mites do most of their damage.
Fine webbing is your next clue. It looks like tiny spider webs stretched across leaves and buds.
This silk mesh traps dust and creates a dirty appearance on your plants. Look for eggs, too. They’re round, clear, and only 0.1 millimeters wide. You’ll find them clustered on leaf undersides.
Mites change colors depending on what they eat and the season. They can appear tan, green, or red. Most have two dark spots on their backs that’s your confirmation.
Effective Scouting Techniques

Daily inspection saves crops. I check my plants every morning. Five minutes of looking beats weeks of treatment later. Here’s my professional scouting method: Hold a black or white plastic board under your leaves.
Tap the foliage gently. Living mites will fall onto the board and start crawling around.
Use a hand lens for detailed inspection. A 10x magnifier works perfectly. Focus on leaf undersides and stem joints.
Sticky traps work great for early detection. Yellow Horiver traps catch adult mites before they establish colonies. Watch for environmental triggers.
Hot, dry conditions stress plants and attract mites. Overwatered or nutrient-deficient plants are sitting ducks. Prevention starts with daily observation.
Prevention Strategies
Stopping spider mites before they start is easier than fighting them later. These proven prevention methods protect your cannabis investment.
Creating a Spider Mite-Free Growing Environment

Keep the enemy out before they arrive. Spider mites enter your grow space through five main vectors: outside air, plants, people, soil, and equipment.
Control these entry points and you’ll stop most infestations. Clean protocols are non-negotiable:
- Wear disposable gowns when entering your grow room
- Sanitize all tools between plants
- No food or drinks in the grow area
- Change clothes after working in your garden
Quarantine every new plant and clone for at least two weeks. I’ve seen too many growers bring home infected plants from dispensaries. Air filtration stops airborne pests.
Install HEPA filters on intake vents. Good air circulation also makes it harder for mites to establish colonies.
Environmental control is your best defense. Mites love hot, dry conditions. Keep humidity between 40-60% and temperatures below 80°F.
Preventive Treatments

Build your plants’ natural defenses. SNS-209 and potassium silicate products like Rhino Skin® create systemic plant armor. These treatments make plant tissues harder for mites to penetrate.
Plant scent modification works surprisingly well. These products change your plants’ chemical signature, making them less attractive to mites.
Introduce beneficial predators early. Don’t wait for an infestation. Release predatory mites like Phytoseiulus persimilis as a prevention measure.
Light preventive spraying with natural deterrents keeps mites away. Neem oil applications every two weeks during vegetative growth work well. Prevention costs less than treatment every time.
Treatment Options: From Home Remedies to Professional Solutions
When prevention fails, you need proven treatment options. These methods range from kitchen ingredients to commercial products that work.
Home Remedies for Early-Stage Infestations

Caught them early? You can fight back with household items. Neem oil is your first line of defense. Mix equal parts neem oil with Dr. Bronner’s soap and water.
This combination suffocates mites and disrupts their feeding. Cold water spray works better than you’d think. Use a fine, firm spray to knock mites off your plants.
Do this three times over five days. D-limonene (orange oil) kills mites on contact. Apply as both a soil drench and a foliar spray. The citrus smell is pleasant for you but deadly for mites.
Natural alternatives include:
- Strong rosemary tea sprayed on leaves
- Coffee solution (1 part coffee to 10 parts water)
- Hydrogen peroxide mixed with water (1:10 ratio)
Follow the three-treatment protocol. Apply any remedy three times over eight days. Never spray during flowering, you’ll ruin your buds.
Professional-Grade Treatment Products

Sometimes you need bigger guns. Lost Coast Plant Therapy is my go-to commercial solution. It’s professional-grade but safe for indoor use.
Grower’s Ally Spider Mite Control offers organic certification. You can use it right up to harvest without worry. Rotation prevents resistance cycles between Spinosad, Pyrethrin, and other organic treatments.
Never use the same product twice in a row. Use 3-4 different products in rotation. This prevents mites from building tolerance. Professional products work faster but cost more.
Biological Control with Predatory Mites
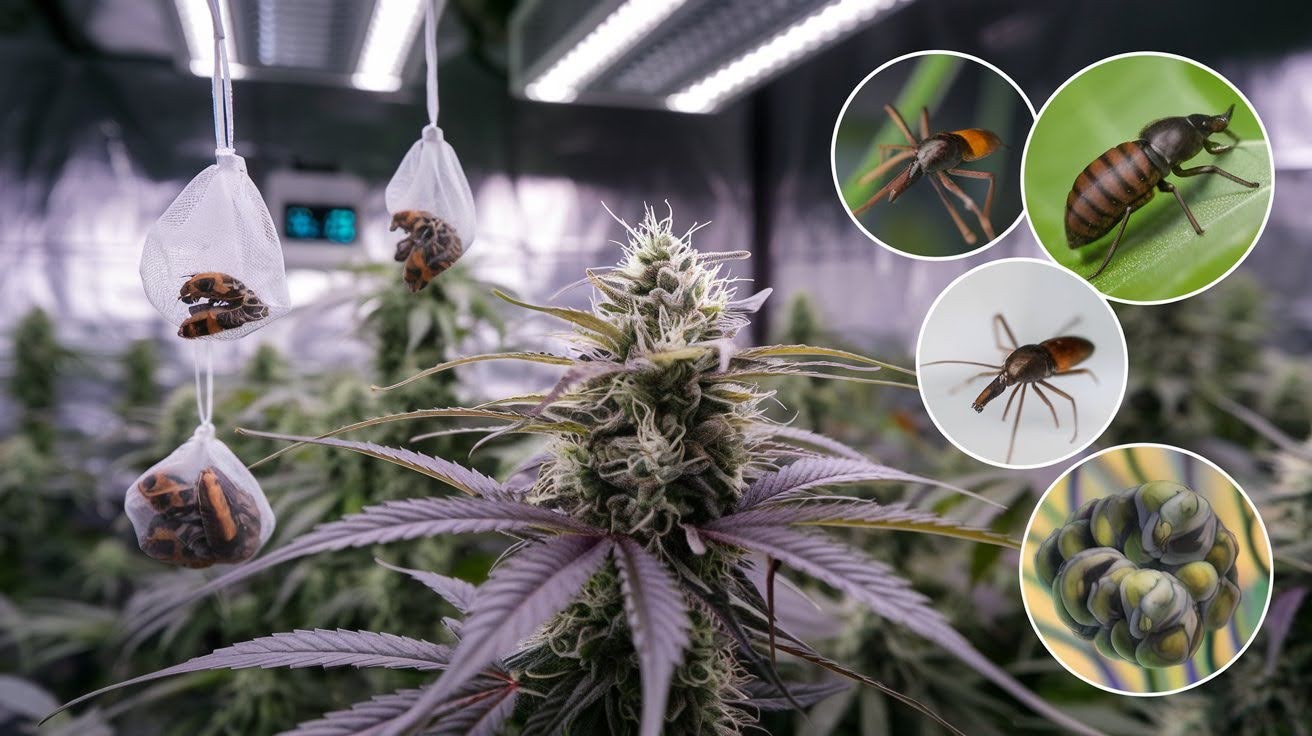
Let nature fight your battles. Phytoseiulus persimilis is the spider mite assassin. These predators specialize in eating spider mites and nothing else.
They’re perfect for established infestations. But here’s the catch: They die when spider mites run out. No food means no predators. Neoseiulus californicus solves this problem.
These predators survive without pests by eating pollen and other small insects. Use them for prevention rather than treatment. Amblyseius swirskii handles multiple pests at once.
They eat spider mites, thrips, and whiteflies. Think of them as your all-purpose biological security team. Feltiella acarisuga is different.
It’s a tiny midge that lays eggs in spider mite colonies. The larvae eat mites from the inside out. They work best in high humidity and dense infestations.
Delivery is simple. Hang small sachets from individual plants. The predators slowly release over several weeks. Biological control takes patience but works long-term.
Advanced Spider Mite Management
Serious infestations require serious action. These advanced techniques help you save plants when basic treatments aren’t enough to stop the damage.
Integrated Treatment Approach

Multiple weapons work better than one. Isolate infected plants immediately. Use physical barriers like plastic sheeting to prevent mites from spreading.
Even a few hours of delay can cost you your entire crop. Strategic pruning saves plants. Remove heavily infested leaves and branches first.
Don’t worry about losing some foliage. It’s better than losing everything. Microbial agents attack from within. Beauveria bassiana and Metarhizium anisopliae are fungal spores that infect and kill mites.
They work slowly but provide long-term control. Timing coordination is critical. Apply microbial agents first, then predatory mites after three days.
Follow with targeted sprays only if needed.
Severe Infestation Response

Sometimes you need to make hard choices. Assessment criteria determine plant fate: If webbing covers more than 50% of the plant, removal is usually the best option.
Young plants recover better than mature ones. Cut your losses quickly. Remove severely infected plants before they become mite factories.
One heavily infested plant can re-contaminate your entire grow room. Intensive treatment for salvageable plants includes:
- Daily cold water rinses
- Alternating biological and chemical treatments
- Increased air circulation around affected plants
- Reduced lighting stress during recovery
Aggressive action saves what you can.
Recovery and Spider Mite Damage Assessment
After treatment comes the critical evaluation phase. Here’s how to assess your plants, determine what’s salvageable, and prevent future spider mite problems.
Post-Treatment Evaluation

Check your work thoroughly. Inspect every bud for damage. Look for webbing, brown spots, and stunted growth. Heavily webbed buds are unsafe they harbor mold and bacteria.
Quality control determines your harvest value. Damaged buds won’t pass inspection. Be honest about what you can save versus what needs disposal.
Monitor predator establishment weekly. You should see predatory mites moving around plants. No predators means re-infestation is coming.
Preventing Future Spider Mite Outbreaks
Learn from this experience. Create a maintenance schedule: Daily visual inspections, weekly sticky trap checks, and monthly predator releases. Consistency prevents problems.
Improve your growing practices. Better air circulation, proper humidity control, and plant spacing reduce future risks. Build early warning systems.
Install more sticky traps, use magnifying glasses during inspections, and trust your instincts when something looks wrong. Prevention beats treatment every time.
Final Thoughts
Spider mites on cannabis don’t have to end your growing dreams. With the proper knowledge, you can catch them early, treat them effectively, and prevent future infestations.
Remember the key points: daily inspection saves crops, prevention works better than treatment, and biological control provides long-term protection.
No matter if it’s your first infestation or your tenth, these proven methods will help you protect your plants. Your cannabis deserves the best care possible.
Stay vigilant, act quickly when problems arise, and don’t be afraid to try different approaches until you find what works in your specific growing environment.
Have questions about your specific situation? Drop a comment below. I’d love to help you troubleshoot your spider mite challenges.
Frequently Asked Questions
How do I know if my cannabis plants have spider mites?
Look for small white spots on leaves, fine webbing on plants, and tiny moving dots on leaf undersides. Use a magnifying glass for better detection.
Can spider mites kill my cannabis plants?
Yes, spider mites can kill cannabis plants within days, especially young seedlings. They drain essential fluids and create conditions for mold and bacterial infections.
What’s the fastest way to get rid of spider mites on cannabis?
Isolate affected plants immediately, then use cold water spray followed by neem oil treatment. Apply three treatments over eight days for best results.
Are spider mites more common in indoor or outdoor cannabis grows?
Both environments can have spider mites, but indoor grows with hot, dry conditions are particularly vulnerable. Outdoor plants face seasonal mite pressure.
Can I use beneficial insects to control spider mites on cannabis?
Yes, predatory mites like Phytoseiulus persimilis effectively control spider mites. Release them early for prevention or during infestations for biological control.


